• What is Simple Suburban Living?

    Homesteadin'. Green living'. Animal lovin'. Square foot farmin'. Tree huggin'. Followin' Jesus. That's Simple Suburban Livin'.

  • Backyard Chickens

    Our little homestead grew with the addition of chickens this year. We are happy to share the journey of raising chicks and building the chicken coop with you.

  • Aquaponics and Gardening

    Simple Suburban Living offers a weekly aquaponics episode that highlights the saga of our indoor aquaponics gardening system. We also share our knowledge of square foot gardening and planting seeds. Our homestead is located in southeastern Michigan.

Showing posts with label farm animals. Show all posts

Monday, March 14, 2016


Here at the Simple Suburban Homestead we like to keep things simple! This coop and all of the additions (auto water/feeder/cleanout) are designed for the suburban family with limited time. The coop can comfortably house up to eight laying hens to provide your family with plenty of fresh eggs daily. The design takes into account standard lumber measurements which reduces waste and cost. The easy cleanout tray makes cleaning the coop as simple as possible with one person cleanups taking under 20 minutes. For the full video series on building the coop please check out our YouTube Playlist here. We hope that this coop brings your family years of quality enjoyment, fresh eggs, and healthy chickens.


Download & Print Chicken Coop Plans


Step One: The Base 


The first step is to level an area greater than 4’ X4’ to accommodate the base of the main coop. The base consists of 4 posts with a 2X4 frame to make it rigid. The outside diameter is no greater than 4’ as to maximize use of 8’ 2X4’s. Each post is resting on its own pad made from cheap patio stones on level ground.
 

Monday, January 18, 2016

https://youtu.be/zd9PpPzgzT8

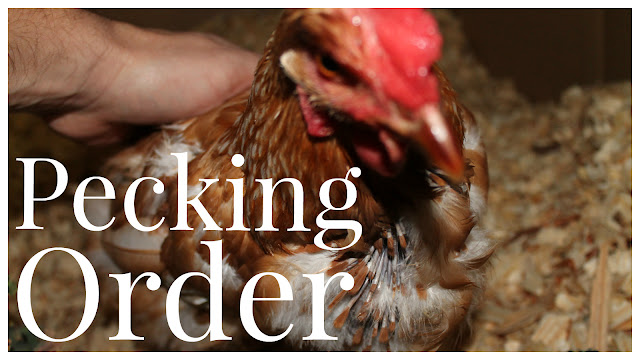
What do you do when one of your chickens starts to get picked on? In every flock of chickens there is a pecking order and sometimes the weaker smaller birds will start to get bullied, mean old chickens. We have not had any issues with this until just recently when we started noticing a lot of feathers scattered around the run and coop.


I started to investigate a few days ago and witnessed one of the larger chickens chasing the smallest one around and literally pull its feathers right out! Not just one at a time but bunches at once. I hoped that it would just lay low and heal up and all would be well in the SSL flock. I could not have been more wrong, by the next day there were more feathers and more bald spots on the hen.
I was starting to get concerned especially since it is winter here in Michigan and temps were dropping into the teens at night. Each day I would check on the hen and see that it had bunkered down in one of the nesting boxes; basically hiding from the rest of the chickens. I tried to feed it some scraps of food and gave it water.


Last night I went out to put the chickens in for the night and I opened the box to check on it and noticed blood all over the tail and wings. It was time to do something to help this little egg producer.
After some research and based off of what I have seen once the flock draws blood they will not stop until the hen is dead. There is something about the look or smell of blood to them that makes it irresistible and they will actually eat the chicken alive basically. Now, I know what some of your are thinking, take it to get slaughtered or put it out of it's misery. Well, no, not going to happen here. Number one I live with 4 girls in this house and if I wanted to continue to sleep inside I don't think that is an option. Number 2, the meat is no good at this age and this chicken still has a year or two of egg production left so I want to save our investment. And, oh yeah, I don't like to see the little runt chicken suffering!


At this point the only thing you can do is separate the chicken from the flock in some way. In our case, the easiest thing to do is to bring it inside our basement or garage and let it heal up. I had and old dog crate that will work just perfectly. Since our garage is a mess right now the basement seems like the logical choice.


Is it weird that I now have a pet chicken in the house? The answer is, yes! But, it is nice to be able to go down and collect an egg without having to go out in the cold so there is that to think about. Maybe I should move the coop inside too! Don't tell my wife that I said that or seriously, it will happen.
I will give an update on this little hen down the road after a full recovery. My only further concern is will it happen again? I may have to separate the bullying chickens for awhile when I reintroduce this one but either way I will take you along and let you know how it turns out. Good luck to all you chicken owners out there and as always let me know if I can help anyone out there in anyway. Have a good one!


Check out the full video here
Please follow us on....

Monday, January 4, 2016


https://youtu.be/wz737EyQSrA

Are you sick of cleaning out those traditional water dispensers? For years when I was a kid my least favorite part about having chickens was that I had to go out in the cold and clean out their water dispenser and even though we had it on a hot plate it seemed to freeze anyway. Check out this watering system from the SSLFamlyDad that addresses these issues and saves money on energy.


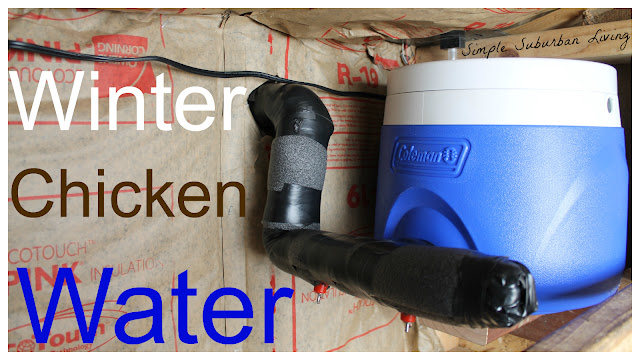
I have tried different things with other watering systems for the chickens and had mixed results. Although I am probably not done experimenting with different ideas, this is the latest:) This system is made of a small 2 gallon Coleman cooler and a few PVC fittings and small sections of pipe.
I started by removing the spigot that comes installed in the cooler. You can then use a 1/2" male and 1/2" female threaded PVC adapter to connect through where the spigot was. I would recommend using some silicone around the fittings to ensure a good seal.

On the inside of the cooler glue in a 1/2" street 90 and point it upward. This will allow some water to always stay in the bottom of the system so that the heater does not burn up. Next, on the outside or the cooler, you can attach any configuration of piping and the chicken nipples that you would like but I chose a basic spilt setup.

I attached a short piece of pipe to the outside 1/2" fitting and then a tee. One short piece of pipe on each side of the tee with a cap on one side and a 90 on the other. On the side with the 90 I ran that up to another 90 at the same height as I want the highest water level to be in the cooler. This will hopefully prevent overfilling from the outside. This section will be run out through the coop wall so that I can fill it from the outside.

For the chicken drippers you can size up a small bolt that matches the thread size of the drippers for pre-threading the holes. I used an 11/32" drill bit to drill one hole in each side of the pipe coming out of the tee on the bottom. You can then thread in the appropriate sized bolt and back out to create some threads to start the plastic drippers. Use some silicone or thread sealant and thread in the drippers, one on each side. I also wrapped the piping in 1/2 foam insulation and some electrical tape. 


The last things is to mount the 50 watt aquarium heater to the bottom using the included suction cup. I also put a dab of silicone on the suction cup to hold it down firmly to the bottom. I also cut a small notch in the lid threads on the cooler to feed out the cord for the heater as well.

You are now ready to install it in the coop. I made a small shelf for mine inside the coop for the winter but I am not sure if I will continue to keep the system inside the coop as it tends to make a mess. I will update on that later. I routed my fill pipe out the back wall of the coop and placed a small threaded fitting there so I can attach a homemade PVC funnel to it for filling. You could also omit this step and just open the lid and pour in some water that way as well.
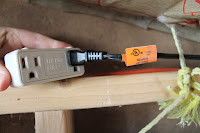

http://tinyurl.com/qz5aa9cOnce you are all setup you can just plug in the aquarium heater to electric however you can (extension cord, hardwired electric box, etc). I also use what is called a thermostatic electric outlet in my setup. This outlet only powers on the heater when the temp reaches 32 degrees or below and stays on until it gets up to 44 and then shuts off. This prevents me from heating water when it is warm outside and thus saving on electric costs. I have used this same outlet for a heat lamp in the past and it works great.

Full Video Walkthrough here

All you need for this project below
2 Gallon cooler - http://amzn.to/1MsHgAY
5 Gallon cooler - http://amzn.to/1QyXBZ5
ThermoCube outlet - http://tinyurl.com/qz5aa9c
Chicken Drippers - http://amzn.to/1uQ8PIM
All of these products and more recommended items from the SSL Family are available at the Simple Suburban Living
Please follow us on....

Wednesday, September 16, 2015


Okay, so you have your own backyard chickens and are enjoying some fgresh eggs daily. But what do you do when you want to leave for a vacation? How can you keep them fed and with fresh water? These are some common questions that I get when discussing the suburban chicken coop.

The system I am using here starts with the Poultry Nipples or Chicken Nipples I used in the original chicken watering system. If you haven't seen the video or read the article check it out here - https://youtu.be/L1HeDlewEBc.


We were planning a 5-6 day vacation and our current watering system (the temporary smaller one in the chicken tractor) would not hold enough water for that amount of time. Many times people have suggested that I hook a hose up to this watering system to keep it supplied with water at all times. The only issue with that is that when there is any water pressure on the chicken nipples they tend to drip and also spray out small bursts of water when the chickens peck at them. For that reason I do not recommend this as a long terms solution but for our 5-6 day vacation this will work out perfectly.
I took a trip up to Ace Hardware to grab a few fittings to connect a garden hose up to our 2" PVC pipe system. I started with a cleanup adapter so that I could screw on and off this hose attachment, 2" PVC threaded adapter, reducing bushing to 3/4" or 1/2" and the hardest part to find - a pipe thread to hose thread adapter.


Assembly only took a few minutes and I was ready to hook up the hose and see what the result would be. I just turned the hose on slightly to reduce the amount of water pressure as much as possible. As I suspected the poultry nipples did drip slowly and constantly. I added some river rock under the watering system to prevent a mud puddle (which the chickens love to drink from for some reason). And watched it for a day before we left. It worked perfectly! Chickens had a constant supply of fresh water and the river rocks allowed the dripping system to drain and not create any mess.

This is a perfect way to keep your chickens or other small animals with a fresh supply of water for a short period of time. I have plans to incorporate a float supply system when I redesign the main watering contraption so stay tuned for more on that later.


You can purchase the Chicken Nipples here - http://amzn.to/1uQ8PIM

Pipe thread-Hose thread adapter - http://amzn.to/1KHNRnw


All of these products and more recommended items from the SSL Family are available at the Simple Suburban Living General Store


Please follow us on....
http://www.pinterest.com/simplesuburban/
http://www.facebook.com/simplesuburbanliving
http://www.twitter.com/simplesuburban5
http://www.instagram.com/simplesuburbanliving


Music - "Water in the Creek" by Josh Woodward. Free download: http://joshwoodward.com/song/WaterintheCreek


Tuesday, August 4, 2015


I have had  a few questions about the sliding door for the chicken coop and so I thought I would do a quick video since I have not really shown the details previously. The design I came up with for the door is very simple and easy to setup and can be done with scrap wood left over from building the coop.


For the door itself I used some poster board to free hand a egg shape that was of suitable size for the door. I then traced it into place on the chicken coop siding and used a jig saw to cut out the opening. Once we had your hole I screwed in 2 2X4's on each side of the framing for each side of the door on the inside of the coop.  This will act as the guide for the sliding door. These guides protrude about 1/2" out from the framing. I used some scraps of 1/2" OSB and nailed them to the front edge of the 2X4's to keep the door from being able to swing inward. I then cut a piece of left over OSB to fit in the track I had created and screwed in two eyelets tot eh top edge.


I am using some nylon rope I have lying around but you can use whatever you have available I tied off the rope through the eyelets in a triangle to leave one main rope centered on the door leading straight up from the center of the door. Directly above the door on the ceiling I screwed in another hook (better to use a full eye here)  this servers as the lift point for the door and routes the rope over to the side top edge of the coop. I drilled a hole through the siding between the framing and roof joists and routed the rope through. The outside of the coop has a small hook and the rope has a loop tied in it to hold the door open.


This setup has been working pretty well for the past year and a half but there are a few improvements I will probably make. I wish I would have used larger gauge hooks and eyes for this project since I have had a couple of the bend and pull out. Not a big deal but just something I had to fix. I would have left a larger gap on the tracking so that the door had more room for expansion and contraction depending on the humidity and temperature as sometimes it can get a little stuck in the summer months. I also would have left a gap at the bottom of the track so that any bedding or chicken mess could not get stuck in the track.


Simple Suburban General Store


Please follow us on...


http://www.pinterest.com/simplesuburban/
http://www.facebook.com/simplesuburbanliving
http://www.twitter.com/simplesuburban5
http://www.instagram.com/simplesuburbanliving


Monday, May 18, 2015


Over the past year I have received overwhelming support and feedback on my chicken coop design and construction. There have been so many wonderful comments and so many have copied this coop and made it one of their own. During this chicken coop building season (yes there is a season for these things) I have received quite a few questions on various aspects of the coop and so I thought it would be nice to run through and answer a few of the ones I hear most frequently.


Does the feed get stuck in the feeder? Does the feed spill on the ground? The feed has no trouble gravity feeding down the center pipe and into each trough on the sides. While the chickens eat they shake it a bit and the feed gently falls down where they can get to it with no trouble. Some feed does spill out, especial when the feeder is full. This has not been an issue as they scratch and peck and get at it off of the ground and also get some needed grit in the process.


Does a lot of water drip on the ground? In short, yes, however this has not really been an issue outside the coop as I have sand under it and it drains right away. Inside the coop I have a deflector that direct the extra drips into the cleanout pan and bedding.


What about ventilation? I have a small window above the nesting boxes that was not shown in the construction video. This provides good airflow in the summer. In the winter, we have the door open tot he coop all day and there are enough cracks and gaps in the siding to allow for decent air to get in.


Why don't you let them free range? We have tried letting them out in our yard a little at a time and they just do too much damage too quickly. They tear into the garden, scratch through the mulch around the trees, poop all over the grass, and eat anything we have growing in the garden. We designed the chicken tractor to move them around and let them scratch through the grass in a contained area. We also let them loose in the garden in fall when we are done growing.


How do you prevent freezing? This year we used heat tape and insulation to wrap the outside portion of the watering system. This was not sufficient to keep the inside portion thawed as well when we had sustained temps below 0 degrees. I will redesign and only heat the inside portion this year. video to follow.


What would you do differently? First I would make the cleanup tray access door about 2 inches larger to allow for a heaping pile of bedding to fit out on top of the tray when I pull it though (suggested by a subscriber, thanks!). I would also have used larger door latches instead of those cheap bolt locks on the chicken run door. Lastly, I would have raised the nesting boxes up about 4 inches from the main coop floor.


Is the cleanout tray needed and worth it? This is completely up to you. I personally love it and I think it makes it so easy to just pull it out on the wheel barrow and take it back to dump it. You can just leave it out and pull up the wheel barrow next tot he coop and sweep the bedding out. Either way it is still super easy to clean.


I hope that helps answer some of the common questions. If you have any comments or questions I did not answer please let me know!


Simple Suburban General Store


Please follow us on....

http://www.pinterest.com/simplesuburban/
http://www.facebook.com/simplesuburbanliving
http://www.twitter.com/simplesuburban5
http://www.instagram.com/simplesuburbanliving


Thursday, March 19, 2015


Do you have to wash your fresh eggs? Do they need to be refrigerated? These are some of the questions I get most often concerning the handling of eggs from our suburban coop. The fact is that the nature God-given coating that is on an egg provides an amazing amount of protection and the less we do to mess that up the better we are!

There is a big difference between the eggs you pull right out from under one of your backyard chickens and one that you purchase at the store, a BIG difference. The chickens that you raise, feed, and take care of are no doubt (well if you take good care of them) healthier than those found crammed in some giant factory farm cage somewhere. The eggs from the factory farms are immediately washed and then packed and refrigerated to prevent bacteria from growing in those eggs. This process takes the natural protection away from the eggs and exposes all of the tiny pores of the shell to outside contaminants which makes refrigeration a must. However, with your farm fresh eggs this does not need to be the case.


When you collect your own eggs they can be cleaned and put into the fridge and stored for several weeks this way with no problem but it is largely not necessary. The coating provided by the chicken is the best defense from bacterial growth in the first place. Washing that coating off is the equivalent to pulling of the eggs protective respirator in a disease infested world. It won't survive long without the protection given naturally by good old' mama hen.

We generally collect our eggs mid-morning and then bring them in and place them in a dish or cartoon near the sink. We do not wash them right away or refrigerate them. They just sit right there until needed by one of the SSLMom's awesome recipes or for one of our famous breakfast egg sandwiches. Once we are ready to use an egg we simply rinse it off with warm water (don't want to accidentally drop poopy eggs shells in breakfast do you?) and throw it in the skillet or mixer. We have left the eggs at room temperature like this for over two weeks at times (although I would probably not let them sit much longer than that).

If we start to get a stockpile of eggs that we cannot eat fast enough then we may wash off a batch and put them in saved egg cartoons for friends or family. We try not to give away eggs with chicken mess still on them:)

The bottom line here is that the natural way the chicken eggs was made by our creator allows for us to store them without worry of bacterial infection at room temperature without the invention of the refrigerator. How do you think people use to store them for the thousands of years before the refrigerator?

There are also other ways for long term storage at room temperature that I will not get into here today but may talk more about on a later discussion.


Please follow us on....

http://www.pinterest.com/simplesuburban/
http://www.facebook.com/simplesuburbanliving
http://www.twitter.com/simplesuburban5
http://www.instagram.com/simplesuburbanliving


Tuesday, January 13, 2015


Check out this video to learn more about raising chickens in the winter. Will they lay eggs when it is cold? Do they need a certain amount of light? How warm should it be? How will they get water in the winter? These are many of the questions that I had going into this first winter with the chickens and I couldn't be happier with our coop, watering system, feeder, and heat lamp. The chickens have been providing us with plenty of eggs for a family of five throughout this very very cold winter.

We have six ISA Brown breed chickens and every day we go out to the coop (well maybe not every day) and there are six eggs waiting for us. This year we have had a very cold winter, I mean, really cold! For the last couple of weeks it has not been above 10 degrees Fahrenheit (-12c) and the chickens have kept on laying! The only issue we have had is if we don't get the eggs in 24 hours they will freeze in the nesting boxes. This could be solved with some extra pine shavings or paper shredding I just haven't gotten around to it yet.


The other issue that I was curious about was lighting. I had installed some solar lights in the coop but since the little solar panels are covered in snow and the batteries don't seem to charge very well in the cold; the light s have not really been working much. The only extra light they get is from the heat lamp when it is on. It is hooked up to a thermostatically controlled outlet that turns it on when it gets to 32 degrees (0c) and then turns off once it warms up to 45 degrees (7c). During the coldest days they pretty much don't come out of the coop except to eat then quickly get back into the warmth. I feel that the addition of the heat lamp in this case is helping them to lay more by creating a nice warm nesting area for them (no science here just opinion).


The only other issue that we have had was with the watering system during the coldest periods. When it was down well below 0 degrees (-17c) with wind chills close to -25 (-31c) the heat tape and insulation could not keep up. The water pipe froze almost solid but not enough to break the pvc at least as far as I can tell so far. The inside part of the pipe also froze and no water was coming out for the chickens at all. I may do some redesigning on this heat system for next year but as long as it is not insanely cold for the rest of the winter it should work ok.

We have been so happy with the decision to get these chickens. They require minimal upkeep and provide us with so much. It is so nice to always know there is a free breakfast, lunch or dinner waiting in the fridge in the form of recycled cartons full of fresh eggs from our girls.


Products mentioned in this video:
Temperature controlled outlet - http://amzn.to/1A9sJRT
Similar heat tape - http://amzn.to/1wRPQzl
Heat Lamp - http://amzn.to/14SnEoH
Heat Bulb - http://amzn.to/1y5HMB4

All of these products and more recommended items from the SSL Family are available at the


Monday, December 8, 2014


Check out this video to see how easy to clean the Easy-to-Clean Chicken coop really is! When I first had the idea (well my wife had the idea), about owning chickens one of the first concerns I had was about cleaning up the mess. I remembered days of my youth when we had to shovel out the chicken coop, what a mess! Dusty, dirty, smelly, hard work shoveling manure, shavings, and pure filth! I wanted to design a coop that made this job easy and I think that I have attained that goal, what do you think?


The cleanup tray is the heart of the idea with this coop. All of the chicken manure and bedding can be swept into the tray from the nesting boxes and around the edges of the coop in a matter of a few minutes. The tray is then pulled out and taken back to the compost pile to be quickly cleaned up while adding some needed nitrogen to the this fall's pile of leaves. The tray can then be returned to the coop and new shavings added, and that is it!


If you have watched some of my other videos you may have noticed that I like to reuse all of our paper products that we use in our home. I use cardboard for landscaping, paper for compost, newspaper for the worm bin, paper towel rolls for trees, and everything else goes into making compressed briquettes for burning in the wood burner.  I am also saving some of the paper shredding that is safe for compost for use as bedding in the coop. It is not that the pine shavings are very expensive but just another way to reuse things that we would normally ship off to recycle, and don't get me started on recycling paper! I will just say this, it is not really good for the environment.


The Simple Suburban Living General Store


Sunday, November 30, 2014


In this video, I show some of the ways that we are keeping the chicken coop warm in the winter including keeping the watering system from freezing. We have had a few days in the 20's here in Michigan so I have had some time to test out the heating system that I have set up and it is working great so far! The watering system that I put together this summer has been working well and it has been so nice not to have to clean out the water!


To prevent freezing in the watering system I am using a product called heat tape or heat cable. You can find that product HERE.  All that is required is some electrical tape, duct or foil back tape, pipe insulation, and some zip ties. The installation is pretty straight forward for any piping system. You run the thermostatically controlled heat cable under the pipe you would like to keep from freezing and hold it in place with zip ties or electrical tape. Then wrap the pipe in insulation and cover with foil back or duct tape. The heat cable only turns on when the temp is below 40 degrees and then turns back off once the water is heated up enough. So far this seems to be working great!


We have also installed a heat lamp on the inside of the chicken coop to provide a little bit of heat for the chickens as well. They enjoy the light it provides and also some warmth! To control the temperature in the coop we are using a small thermostatically controls outlet. This product is available HERE. This little outlet turns the heat lamp on when the temps gets down to 35 degrees and then warms the coop up to 45 degrees and then shuts off.  We got this idea from someone who commented on one of our videos.  We really appreciate feedback like that!  This saves energy and allows it to automatically keep the temps above freezing inside the coop. I know that the chickens can probably do without the heat but they do seem to enjoy it!


Next year, I will run more permanent electrical wiring, light sockets, and installing an outlet for the heat cable, but for now I have a extension cord run to the coop from an outdoor outlet on our home. This will work for now but I plan on implementing a more permanent solution.


I hope this helps you with your own coop in some way!


SSL Family Dad


This post was shared at:  Homestead Barn Hop, Simple Lives Thursday, The HomeAcre Christmas Hop


Saturday, November 8, 2014


Check out this video for part two of the chicken tractor construction. We are added a nesting box, back panel for the detachable part of the coop, and a watering system for the chickens while there are cruising around the yard. In the first part of the chicken tractor construction I added the wheel system that lifts the coop up a few inches to be moved and then allows for it to rest flat on the ground once out in place in the yard.


The wheel system was the trickiest to engineer but the nesting box, back panel, and watering system took the longest to build. I had over 60 minutes of video that I tried to condense into this 12 minute clip!  Now the chickens have water and a place to lay some eggs while out and about the yard.


The idea of this and any chicken tractor is really two things. First, we want to let the chickens have some new ground to scratch through for worms, grass, bugs, and just some new scenery. Secondly, I wanted to be able to easily move the run away from the coop for an easy once per year cleaning of the chicken area. This way I can roll it out and while the chickens are in heaven scratching away on some new ground I can quickly cleanup and add some fresh dirt/sand to the run and then push it back. So far I think that this chicken tractor has met both of those goals and it makes the chickens lives a little better and mine as well!


This post has been shared at:  HomeAcre Hop, Backyard Farming Connection Hop, Wonderful Wednesday Blog Hop


Monday, September 22, 2014


In this video, I discuss some of the benefits of having backyard chickens. About six months ago, we decided that we were ready to buy some chickens and dive into animal husbandry in our backyard. While my wife and I had discussed this idea in the past, we had always dismissed it since we live in a small suburban community.

Although we are not in a big city, we do have enough room, but it just didn't seem like something that would fit with our lifestyle or living environment. After all, what would the neighbors say? Don't chickens smell? How much time would be invested in cleaning and feeding the chickens? How much does it cost to feed them, heat the coop, and provide overall care? These were many of the questions that my wife and I had that made us reluctant to get into owning chickens.

After having these chickens for about six months now my views and opinions have changed quite a bit, and we feel many of our questions have been answered. In this video, I share some of my opinions about how the chickens have become a perfect fit into our family. If you have been thinking about owning chickens, I hope you find this encouraging!

Have a good one!
SSL Family Dad


Tuesday, September 16, 2014


Watch as the kids of Simple Suburban Living taste-test the farm fresh eggs from our backyard chickens.  We even scrambled up some store-bought white eggs for them to compare.  Although a very silly video, we hope it gives you insight on the benefits of getting backyard chickens of your own.  Our little homestead only got better when we added chickens! 

The kids of SSL can be very picky eaters, so we knew this was the ultimate test for our chickens. 

Thanks for watching!


This post has been shared at:  Homestead Barn Hop, Simple Lives Thursday, HomeAcre Hop


Wednesday, September 10, 2014


We added chickens to our little homestead this year and couldn't be happier with our decision!  In this video, I share with you tips and best practices for raising chickens in a small backyard.  We are so excited about the things we did to make the coop as maintenance-free as possible. 

We have setup and designed our chicken coop in ways that make it possible for us to go away for a long weekend without asking someone to feed the chickens.  We know you will want to implement these same ideas in your chicken coop as well.

To learn more about how we built the automatic feeder for under $20, click HERE.

To learn more about how the watering system was constructed, click HERE.

Don't hesitate to let me know if you have any questions!

Thanks for stopping by!


Products used:


This post was shared at:  Homestead Barn Hop, The Backyard Farming Connection Hop, HomeAcre Hop, Simple Lives Thursday


http://homespunoasis.com/simple-lives-thursday-211/


Friday, September 5, 2014


In this video, I am working on the conversion of the chicken run into a chicken tractor. There are several reasons why I would like to do this. The chickens enjoy eating grass, bugs, and scratching through a fresh piece of yard now and then. Also, it will allow me to move the run to easily clean the area where they spend most of their time. I have been wanting to get this done for quite some time but have been busy with other things this summer.


I have been looking for some old piece of junk on the side of the road somewhere that had wheels on it I could scavenge but have thus far been unsuccessful. I was able to pick up a small set of wheels at Home Depot that will fit the burden but not really the bill. I paid much more than I wanted to but they are some pretty sturdy looking wheels that should last a long time.

The main thing that I needed to tackle with this project was to build a hitch for my garden tractor and to build a system for the wheels so I could move them into position when I am ready to move the run around the yard. I still have more work to do here (build a nesting box, food scraps trough, roosts, and portable watering system. These will be done as soon as time permits and I will get another video that should cap this project off.


This post was shared at:  Homestead Barn Hop, HomeAcre Hop, Simple Lives Thursday, The Backyard Farming Connection Hop


Thursday, July 17, 2014

The chickens are almost four months old now.  They have been healthy, and seem to be very happy.  The automatic waterer and feeder in the coop have been working out great, so great in fact, we took a four-day vacation last week and didn't have to ask a neighbor to feed them. 

ISA Brown chickens are known for their high egg production, approximately 300 eggs per year per chicken.  Because we were told they wouldn't start laying until they are around six months old, we never check their nest boxes.  Last night, Todd and I walked out to the coop to close them in for the night.  Todd opened the nest box lid for the first time in awhile and discovered 14 eggs!  We were shocked! The girls came screaming out of the house they were so excited.

They do seem to have faces only a mother could love.  And this one appears to have cataracts already or something.  But we do love them and are very grateful for the eggs they are now providing.


We hope this encourages anyone out there contemplating raising chickens in a subdivision, or small backyard.  If we can do it, anyone can.


Still sleepy but couldn't wait to check for eggs this morning. 


This post has been shared at:  The HomeAcre Hop, Simple Lives Thursday, The Backyard Farming Connection Hop, Front Porch Friday


Sunday, June 15, 2014

Here is the latest addition Todd made to our chicken coop.  The semi-automatic feeding system.  We had a difficult time trying to come up with a name for it because it's not automatic, but it sure does make things easier for us.  Our chickens are the sweetest chickens in this whole world, but they can get a bit crazy when their food dish is empty.  No more walking in the coop and filling the tiny feeder that we had, and this one is much cleaner.


Here is where we fill it (the pipe comes out right by the nest boxes):


This video runs through the build process for this simple feeder design and also shows it in action. The feeder should hold enough food for 2-3 days and will cut down on the amount of time spent cleaning out and filling the smaller feeder. This is also much better than the feeders that sit on the ground as they get full of dirt quickly.  We made the mistake of thinking their dish was full of food on several occasions, but it was full of sand instead.

The 4" drainage piping used for this project is much cheaper than the 4" schedule 40 PVC. The fittings for the drainage pipe are also much cheaper keeping the cost of this project under $20.


This post was shared at:  Simple Saturdays Blog Hop, HomeAcre Hop, Simple Lives Thursday, The Backyard Farming Connection Hop, The Homestead Barn Hop


Thursday, May 15, 2014


Tired of cleaning the chicken water dish?  In this video, I will show you the process I used to build our no-maintenance watering system and install it in our chicken coop.  This system was designed to tie into a future rain barrel system that I hope to setup soon.


To teach the chickens how to drink from it, I held each of their beaks up to the chicken nipple until the water dripped out.  It took a few tries for each bird over a period of a couple days, and only when I took away their plastic dish and they were thirsty enough, did they really catch on to the chicken nipples.  The chickens have been exclusively drinking from the nipples for about three days now.


I hope this helps inspire some ideas for your coop as well!

Thanks for watching,

Todd


Products:


Wednesday, May 14, 2014

Do all of us chicken mamas think our chickens are the best, smartest, and prettiest chickens ever born?  Love must be blind because we really like our chickens a lot.


And our girls even have different colored eyes!  Ours must be eggstra-special (okay, I'll stop).


But seriously, they have been out in their coop now for two weeks and everything has been going extremely well.  No casualties, and they seem very happy. 

Todd also finished the watering system in the chicken coop.


They can access their water outside under the coop.......


....or inside. 


It holds a little over 2 and a half gallons of water, here is where we fill it.  We hope to hook it up to our future rain barrel system one day.


It took them just a few days to learn how to drink from it. Several times a day, Todd would hold each one and put their beaks up to the chicken nipple, but only when we removed their plastic watering bowl did they finally figure it out. 


Two days ago, they started going into their coop at nighttime on their own.  Up until then, we had to pick up each one and put them in the coop.  That was making me extremely frustrated because they would not go willingly and it would take the girls twenty minutes each night to get them in.  It was mad chicken/children chaos every night at bedtime.   The neighbor kids would even get in on it, too.  Needless to say, we're VERY glad that instinct finally kicked in. 

If only we could convince the kids to go to bed on their own........


This post has been shared at:  The Homestead Barn Hop, The HomeAcre Hop, The Backyard Farming Connection Hop, Simple Saturdays Blog Hop