• What is Simple Suburban Living?

    Homesteadin'. Green living'. Animal lovin'. Square foot farmin'. Tree huggin'. Followin' Jesus. That's Simple Suburban Livin'.

  • Backyard Chickens

    Our little homestead grew with the addition of chickens this year. We are happy to share the journey of raising chicks and building the chicken coop with you.

  • Aquaponics and Gardening

    Simple Suburban Living offers a weekly aquaponics episode that highlights the saga of our indoor aquaponics gardening system. We also share our knowledge of square foot gardening and planting seeds. Our homestead is located in southeastern Michigan.

Showing posts with label SSL Family Dad. Show all posts

Monday, May 30, 2016


The next step in the aquaponics renovation - positioning the grow beds and lowering them as low as I can get them. Although this was not an easy process I am so glad it is done! The new height of the grow beds is 41" from the floor to the top of the framing and it is a much more comfortable working height than before.


Grow bed dimensions to follow shortly...


General Store


Please follow us on....


http://www.pinterest.com/simplesuburban/

http://www.facebook.com/simplesuburbanliving

http://www.twitter.com/simplesuburban5

http://www.instagram.com/simplesuburbanliving


The SSL Family Mom wanted a better sound system for her recent birthday, this is what she got....
In this video I go through a very high level overview of the Kicker subwoofer installation. I am using all Kicker brand products here listed below.


To see the full video on the project, click here.


The next step in the bonus room renovation is to get these closet doors built. In a normal situation you can just run out the big box store and buy a pre-hung door. This would include the frame that just slides into your opening and with minor adjustments you have a door. Well, in the case of this bonus room I have slanted ceilings and shorter than standard opening so I need to make something custom. Here is the process that I used, right or wrong they turned out great!


To see the full video on this project click here


 and follow us on....


Saturday, May 14, 2016


In the midst of several other projects I have pending I have started yet another project - this bonus room renovation. 


 We have what is called a "bonus room" in our home above the garage. This is a basic multi-use room that was added during construction but does not have closets and therefore is not considered an actual bedroom. My oldest daughter has been calling this her home for the past five years and it is far past time to get her some proper closets.


I started by removing the carpet and framing in an area under the window for a "daybed" and a closet on each side. The daybed will hold a regular twin mattress and be used for guests and sleep-overs.


The slope of the ceiling will make it hard for the closet doors but there is just enough room for me to walk standing straight up at the tallest point. The closets will later get a custom door and shelf on the inside.  


Time to stand back and admire your work........  Is that a little bit crooked......

With projects like these I always like to call in the cleaning lady to pick up after my mess


The day bed is framed in so that the mattress will sit just below the front wall and below the windowsill so no one rolls out to the driveway below:) This entire area will be covered with 3/4" pine plywood I have left over from the plywood flooring project. This will provide a bit more durability for the kids jumping around and climbing in and out.


At this point I also did the rough electrical. I wired everything into a junction box that will be accessible from the back panel of the day bed. That is where an old receptacle used to be that will now be covered by the bed framing. I will be added one receptacle on the front wall of the bed and two lights, one in each closet.


Sunday, April 17, 2016

 Another addition to the "smart home" here at the SSL Homestead and we love it! Using a smart thermostat can be a great way to control heating and cooling costs and reduce your monthly energy bills! With our intentions to get off the grid someday and eventually get Wind and solar power for our home I am always looking for ways to reduce our energy costs and save us some money!


For years this has been our thermostat, boring, ugly, inefficient, and just plain no fun. This is the thermostat that came with our home and was no doubt the one installed when the home was build 27 years ago. It is digital at least but has no options for scheduling temperature changes.
http://amzn.to/1QJfggh


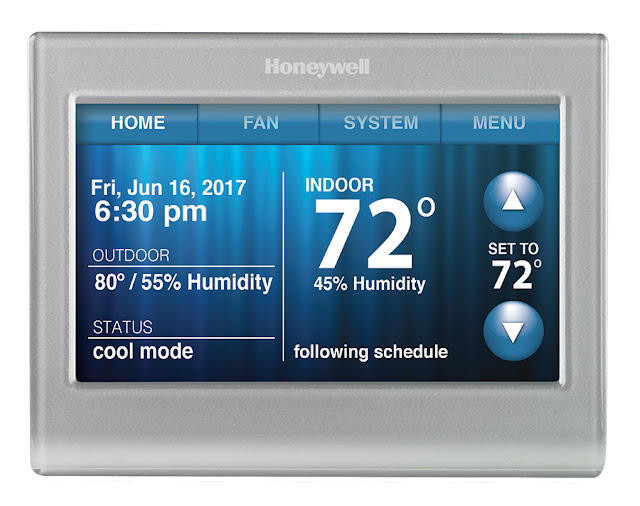
And this.....is the new one, much nicer looking and much easier to use. Now, I know there are a lot of choices out there when looking for thermostats and also many different price options. If you are just looking fort the ability to be able to program different temps for different days of the week you can get a 7 day programmable thermostat for much cheaper. But we wanted more control; full control of the temperatures whether we were home or not home. This Honeywell Smart Wifi thermostat fit the bill. After looking at the competition (mainly Nest) we decided to go with this model, it was about $100 cheaper and met our needs.


First things first, we need to get under the hood. Pop the front cover off of whatever old hideous thermostat you have. You should now see some wires, if you have just heating it might only be 2 or 3, if you have heating and AC you should see 5-7 wires depending on your setup. Either way, Honeywell makes this easy. They send you a bunch of stickers that match the labels on the thermostat so carefully remove each wire here using a screwdriver and then label it appropriately as you remove it. Once all of your wires have been removed and labelled go ahead and take off the entire baseplate from the wall. To watch the video of the installation please click here.


Now you are ready to put on the new baseplate for the new thermostat. Just attach it using the provided screws and/or drywall anchors. Next, connect the wires to the appropriate terminals using your labels as a guide. Each wire should line right up to a labelled terminal on the new baseplate.


 Press on the smart thermostat firmly to the baseplate until it snaps into place. Your new thermostat is now installed! It should now power up and give you a welcome screen with some info. You can then download the app or go to a computer to setup your account. Once this is done complete the setup steps before first use of the thermostat.


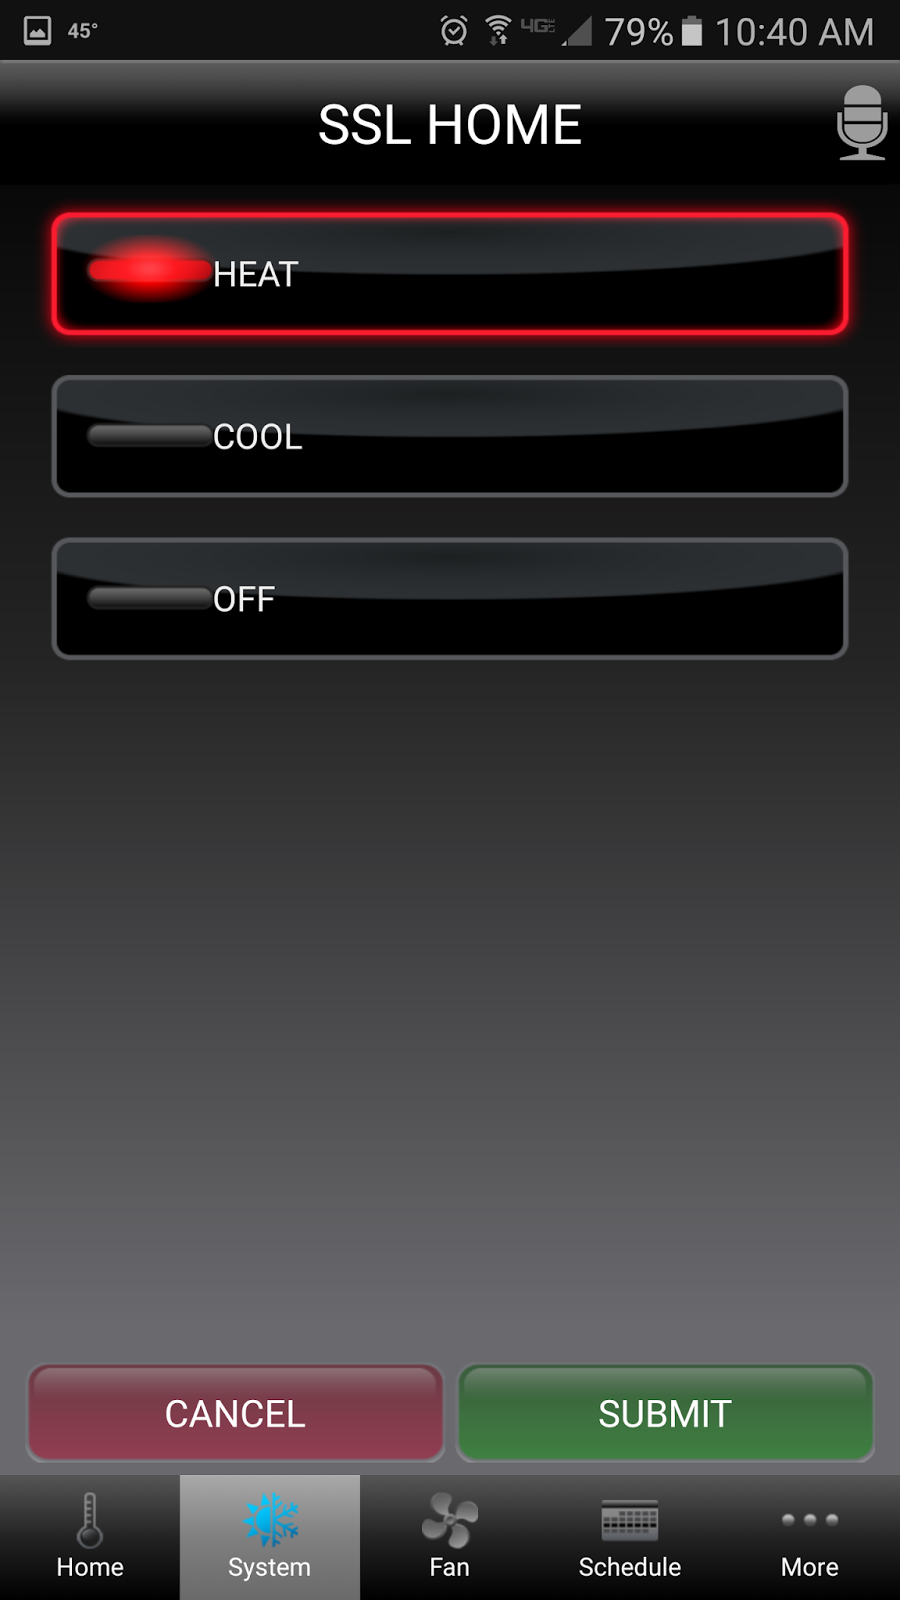
Once everything is setup you can control your home's temps from anywhere in the world! I would recommend setting up a schedule for heating and cooling first right from the app so that you can immediately start saving money. While your at work, turn the heat down about 5 degrees and then an hour before you get home have it turn back up. At night, turn it down as much as you can comfortably bear and have it turn back on in the morning before you are awake. Just using a simple schedule can save you so much on heating and cooling!


The home screen on the thermostat and the app home screen are almost the same and offer you all the main controls you will need regularly. At a glance you can see the temp inside, outside, humidity, and weather. You can change the temp and deviate from your schedule if you are home on a day off or just feeling like a manual adjustment for the time. It will automatically revert back to your schedule at the next scheduled temp change time.  Now my wife and I can fight over the temp in the house from our phones!

We have been using this thermostat for a few months now and absolutely love it. This is an investment that will pay for itself in savings over the first 2 years easily. There are also so many other expansions in the smart home realm that work with this such as voice control through Amazon Echo and other smart products that can all work together. If you are interested in watching the full setup click here for the video. More info on the Honeywell smart thermostat here.
   
  
All of these products and more recommended items from the SSL Family are available at the

You can follow us on....

Monday, March 14, 2016


Here at the Simple Suburban Homestead we like to keep things simple! This coop and all of the additions (auto water/feeder/cleanout) are designed for the suburban family with limited time. The coop can comfortably house up to eight laying hens to provide your family with plenty of fresh eggs daily. The design takes into account standard lumber measurements which reduces waste and cost. The easy cleanout tray makes cleaning the coop as simple as possible with one person cleanups taking under 20 minutes. For the full video series on building the coop please check out our YouTube Playlist here. We hope that this coop brings your family years of quality enjoyment, fresh eggs, and healthy chickens.


Download & Print Chicken Coop Plans


Step One: The Base 


The first step is to level an area greater than 4’ X4’ to accommodate the base of the main coop. The base consists of 4 posts with a 2X4 frame to make it rigid. The outside diameter is no greater than 4’ as to maximize use of 8’ 2X4’s. Each post is resting on its own pad made from cheap patio stones on level ground.
 

Monday, February 29, 2016


You know him as the do-it-yourself, gardening, chicken farming, computer geek.  But there are a few things about the SSL Family Dad that you may not know.  

He's the man of the house, literally.  He's completely outnumbered by me and our three daughters.  Even our dog, cats and chickens are all girls. He does a great job handling all of us, and he's not above doing a last-minute pony tail, or helping our youngest get in and out of her princess dresses ten times a day.

He says he hates it, but he really loves to shop.  But only at Home Depot.  You see, whenever we go to one of my stores, he stands around looking like the saddest person on the planet.  But send him into a Home Depot to buy a single item, and he never makes it out in under an hour.  Whenever I tease him, he says he has to think about his project, and talk to the sales guy, and walk up and down every single aisle, and plan things out. That's called shopping, my dear, and you love it.  


He doesn't buy any clothes for himself, EVER.  If he owns anything post-high school, it was either a free t-shirt from church, purchased for him by me, or given to him as a Christmas present from his mom.  He also went from the Army, who provided him with everything he needed to wear, to a job at a company that provided him with uniforms, so he really never found a need to buy his own clothes. He's the lowest maintenance guy I know.


If I were to sum up the SSL Family Dad in one word, it would be DEVOTED.  Everything he does, he does with everything he has.  He's either all in or all out once he makes up his mind.  I like that about him, because I tend to be wishy washy.  And after all these years, I've also never heard him tell a lie, not once, not ever.  Nothing in him has the ability to be dishonest, you can count on that.  It's refreshing, and an unusual quality in people these days.

He's a loving, committed husband.  On the days I have to work, he makes me breakfast and brings it to me while I'm getting ready.  He packs our lunches, feeds the dog, signs school papers, starts my car, he's the glue that holds our house together the days when I have to work.  He's the glue no matter what day it is.  Even if my roses come from our local grocery store, he makes me feel like the luckiest girl in the world every morning because I get to wake up next to him.  I wish every person could feel the love I feel from him.

Sometimes to thank him, I pour his coffee for him, too..........


He's the best dad, period.  He loves his girls and everyone knows it.  They know it.  He's sensitive to their emotions, but he's tough on them.  And when he promises them something, he never goes back on his word.  Ever.  They know when he says something, he means it, and they trust him. That's huge. 


And holding him together at the core of who he is, is his love for the Lord.  It's the reason he does everything he does.  God is the reason why he loves me, loves our girls, why he's honest, trustworthy, and hardworking.  No, my husband is not perfect, nor is our marriage perfect, but he strives to please the Lord everyday of his life.  And that is what makes him the best catch, and the best SSL Family Dad.

And his favorite team is MSU (in case you didn't already know).


"Love the Lord your God with all your heart and with all your soul and with all your strength and with all your mind" ~Luke 10:27


Friday, February 12, 2016


Watch the full video here

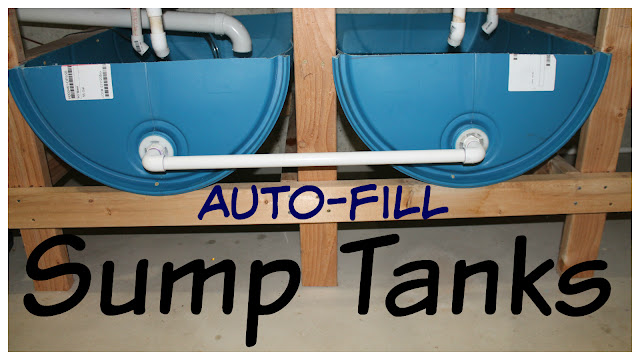
Phase one of the aquaponics re-design is completed! The first step of this overhaul was to move and re-design the sump tank system. I wanted to accomplish two goals - Lower the sump tanks to the lowest possible location, and also move them under the grow beds to save space and piping.
So, why would I want to spend hours moving a perfectly good sump system? Well there are a couple of flaws with this design that I talked about briefly in the "tips and tricks" video.


With the current setup the sump tanks are all the way to the far left standing vertically- just one 55 gallon drum on end. The issue I have had is that if all four grow beds decide to drain at the same time the level in the sump gets just high enough to spill small amounts of water out the large drain pipe openings. There is also a lot of wasted space under that would work perfectly for some sumps so on to the install.  

https://youtu.be/h8V54XnNeao

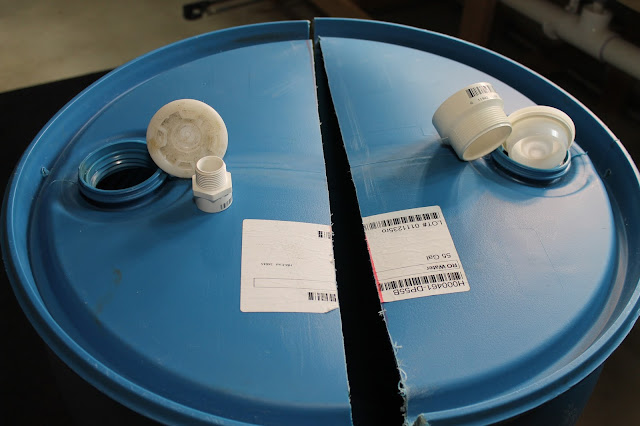
I started with a 55 gallon drum that has been cut in half. I have more on that here, but I cut it in a way that both bungs would be useable and perfectly in half.


Each bung has different main threads but the inside of each cap has 3/4" threads that I can use to route water between the two halves.


http://amzn.to/1nsSZYP

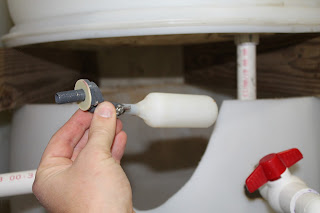
I removed my auto fill mechanism from the old sump tank. This auto-fill system has been working perfectly for almost two years. I love not having to add water to the system! I installed this into the side of one of the barrel halves using a small bit of silicon to seal the threads.


I am using filtered water for the auto-fill as our water has too many carbonates which raises the pH in the system. During the renovation I changed the filters in our RO system which haven't been changed in over 5 years!

http://amzn.to/1lIg7AN

This is the Aqueon 2300 pump, this model has been pumping with not a single issue for two years straight. That is 24/7 run time and I think I only took it apart to clean it once and it didn't really need it. I moved this over to the new sump tanks and used a temporary 3/4" flexible hose to get from the sumps to the fish tanks.


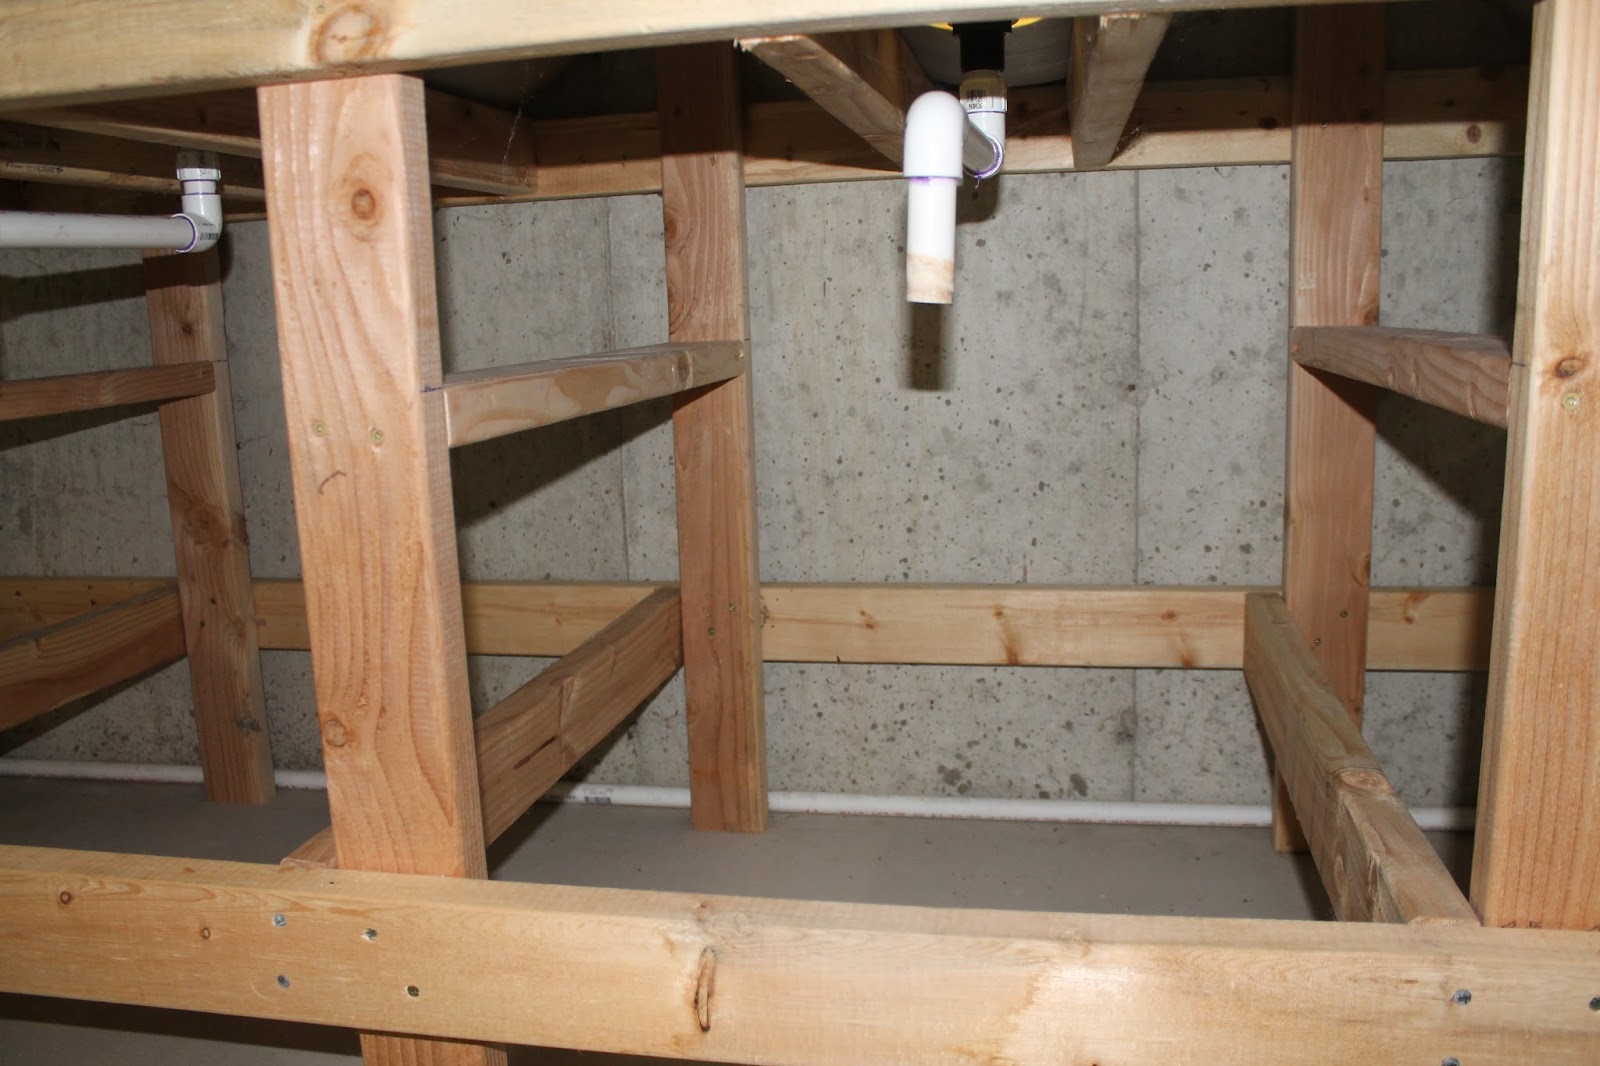
I added some supports on either side of the grow bed framing legs to support the sump tanks horizontally.


The sumps were inserted into the openings and screwed in with deck screws. Both halves were connected with 3/4" piping to transfer water between the two in a sense allowing them to act as one larger tank.


Each grow bed has a bell siphon drain underneath that needs to be re-routed to the new sumps. I was able to remove the long drain pipe with this setup and all four beds now drain directly into the sumps. Less pipes and less to look at.


The final result here is a sleeker, more efficient, and less expensive setup that looks as nice as it runs. Next up will be to move the entire grow bed system and lower it about 8 inches. Please let me know if you have any questions!


Products used in this project

All of these products and more recommended items from the SSL Family are available at the
Please follow us on....

Monday, December 7, 2015


Internet running slowly? Need to get through those power outages without dropping connection? In this tutorial I will share few ways to speed up your home internet service, protect from power outages, and even save  some money on your bill in some cases.

These tips and tricks are gong to apply to those with cable or DSL type internet service mostly but some other types will benefit as well so stay tuned to see what applies to you. The first tip is in regards to hooking up a cable or DSL modem and I will break it down separately for each.

http://amzn.to/1YpGydc


Cable modems - When hooking up a cable modem you should always hookup to the first spilt of the coax cable as soon as it enters your home. In most cases your cable comes in the basement or crawl space and then splits with one or two large splitters to all of your cable jacks in the home. Instead, purchase one good 2 way splitter and install that as soon as the cable enters the home. One leg will go directly to your modem and the other can go to the larger splitters that feed the TV's.

DSL modems - DSL service is provided via phone lines. As with cable it is important to have a dedicated phone jack or line run directly from the outside junction box to your DSL modem. This might require a call to your provider for a free setup but in most cases just follow the lines to make sure it goes directly out to your outside phone connection. With DSL it is also important to make sure you have filters on any phones in your home. These filters are provided by your service provider in most cases or they can be purchased online - http://amzn.to/1PA8Duj.

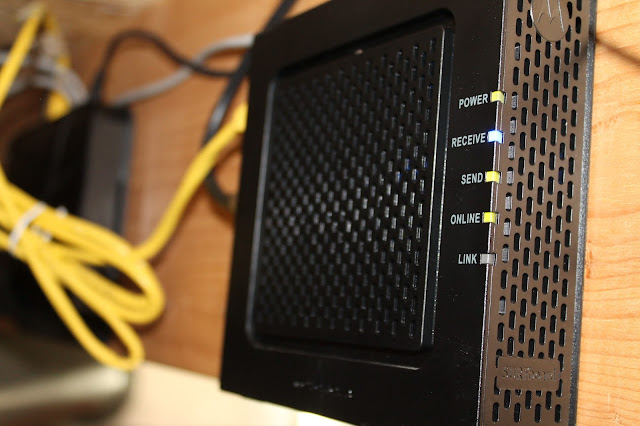
Purchasing VS. Renting - No matter what kind of internet provider you have in most cases they will provide a modem to you when you sign up for service. But don't be surprised if they are charging you anywhere from $3-$15 per month for that equipment. You can pickup a cable or DSL modem online or at Best Buy/Walmart for less than $60 in many cases. This saves you the monthly fee and also allows you to have newer better equipment. Check with your provider for recommendations on a new modem for the best possible service to your area.

http://amzn.to/1kxqJCmPower protection - Once you have your own nice new modem and router you should provide some basic protection  for them. Using a small network battery backup will protect your equipment and also allow you to get on the internet right through a 3-4 hour power outage. These are inexpensive devices and can be setup in minutes. - Battery backup - http://amzn.to/1kxqJCm


Wireless Interference - A properly placed wireless router can be the difference between blazing fast and slow as molasses. The best place for a wireless router is UP HIGH, the higher the better in most cases. You also need to think about what is near the router, cordless phones, microwaves, Christmas lights, TV equipment, speakers, etc. All of these things can dramatically interfere with your wireless signal and slow you down. The orientation of the router is also important. If it is designed to lay down flat, lay it down flat. If it has as stand or legs to stand it up vertically try standing it up. You can also change the orientation and see if signal improves in certain areas as you change it. Above all else it is important to start with a good wireless router. I have a few options below this article of models that I have found to be good. Make sure you have a dual band N or a newer AC standard wireless router and place it in a central location in your home, on the middle level if you have a 2 or 3 story home will be best.


Eliminating dead spots or weak signal areas - If you have followed all of the steps above and you still have weak signal in some areas you can try a couple of things. I did a video on adding a second router here - https://youtu.be/n3plXzZ1Ckc, that can be a great way to solve this issue. If that is not an option consider purchasing a powerline wireless extender - http://amzn.to/1OvyKPN


Check out the full Tips and Tricks video here -


Network Battery Backup - http://amzn.to/1kxqJCm
Motorola Modem - http://amzn.to/1YpGydc
Dead spot terminator - http://amzn.to/1OvyKPN
DSL filters - http://amzn.to/1PA8Duj
Netgear router - http://amzn.to/1OvAgl1
Cisco router - http://amzn.to/1OvAkRD

All of these products and more recommended items from the SSL Family are available at the Simple Suburban Living
 Follow us on....