Our little homestead grew with the addition of chickens this year. We are happy to share the journey of raising chicks and building the chicken coop with you.
Simple Suburban Living offers a weekly aquaponics episode that highlights the saga of our indoor aquaponics gardening system. We also share our knowledge of square foot gardening and planting seeds. Our homestead is located in southeastern Michigan.
The SSL Family Mom wanted a better sound system for her recent birthday, this is what she got....
In this video I go through a very high level overview of the Kicker subwoofer installation. I am using all Kicker brand products here listed below.
The next step in the bonus room renovation is to get these closet doors built. In a normal situation you can just run out the big box store and buy a pre-hung door. This would include the frame that just slides into your opening and with minor adjustments you have a door. Well, in the case of this bonus room I have slanted ceilings and shorter than standard opening so I need to make something custom. Here is the process that I used, right or wrong they turned out great!
Another addition to the "smart home" here at the SSL Homestead and we love it! Using a smart thermostat can be a great way to control heating and cooling costs and reduce your monthly energy bills! With our intentions to get off the grid someday and eventually get Wind and solar power for our home I am always looking for ways to reduce our energy costs and save us some money!
For years this has been our thermostat, boring, ugly, inefficient, and just plain no fun. This is the thermostat that came with our home and was no doubt the one installed when the home was build 27 years ago. It is digital at least but has no options for scheduling temperature changes.
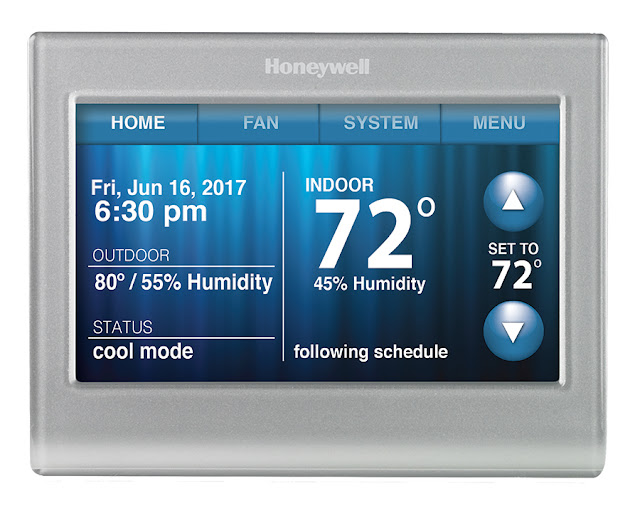
And this.....is the new one, much nicer looking and much easier to use. Now, I know there are a lot of choices out there when looking for thermostats and also many different price options. If you are just looking fort the ability to be able to program different temps for different days of the week you can get a 7 day programmable thermostat for much cheaper. But we wanted more control; full control of the temperatures whether we were home or not home. This Honeywell Smart Wifi thermostat fit the bill. After looking at the competition (mainly Nest) we decided to go with this model, it was about $100 cheaper and met our needs.
First things first, we need to get under the hood. Pop the front cover off of whatever old hideous thermostat you have. You should now see some wires, if you have just heating it might only be 2 or 3, if you have heating and AC you should see 5-7 wires depending on your setup. Either way, Honeywell makes this easy. They send you a bunch of stickers that match the labels on the thermostat so carefully remove each wire here using a screwdriver and then label it appropriately as you remove it. Once all of your wires have been removed and labelled go ahead and take off the entire baseplate from the wall. To watch the video of the installation please click here.
Now you are ready to put on the new baseplate for the new thermostat. Just attach it using the provided screws and/or drywall anchors. Next, connect the wires to the appropriate terminals using your labels as a guide. Each wire should line right up to a labelled terminal on the new baseplate.
Press on the smart thermostat firmly to the baseplate until it snaps into place. Your new thermostat is now installed! It should now power up and give you a welcome screen with some info. You can then download the app or go to a computer to setup your account. Once this is done complete the setup steps before first use of the thermostat.
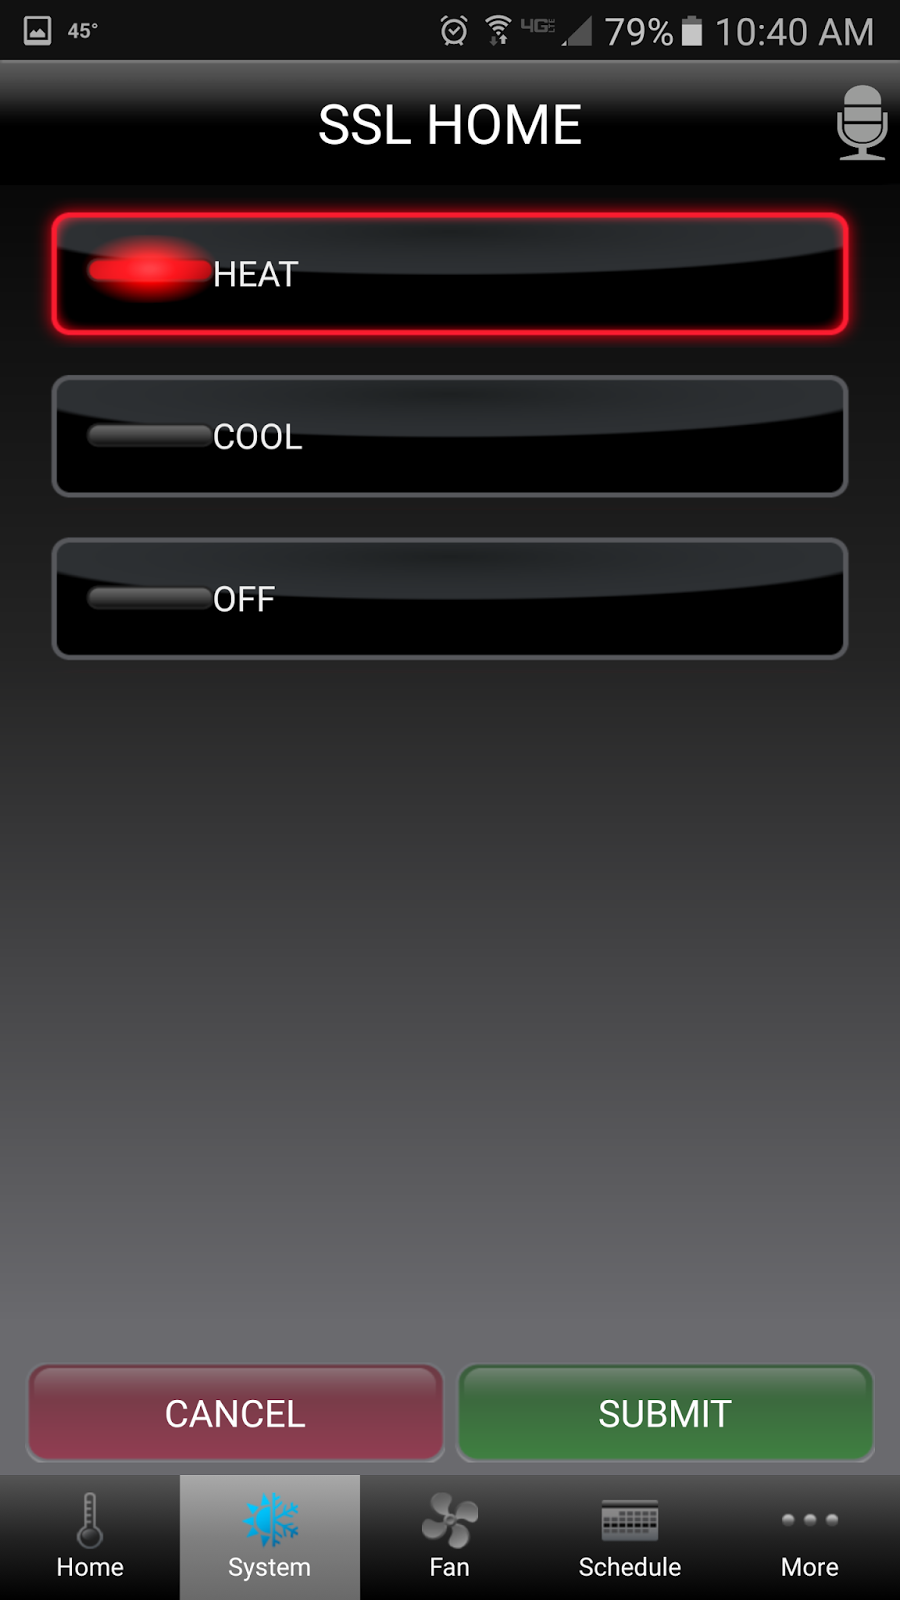
Once everything is setup you can control your home's temps from anywhere in the world! I would recommend setting up a schedule for heating and cooling first right from the app so that you can immediately start saving money. While your at work, turn the heat down about 5 degrees and then an hour before you get home have it turn back up. At night, turn it down as much as you can comfortably bear and have it turn back on in the morning before you are awake. Just using a simple schedule can save you so much on heating and cooling!
The home screen on the thermostat and the app home screen are almost the same and offer you all the main controls you will need regularly. At a glance you can see the temp inside, outside, humidity, and weather. You can change the temp and deviate from your schedule if you are home on a day off or just feeling like a manual adjustment for the time. It will automatically revert back to your schedule at the next scheduled temp change time. Now my wife and I can fight over the temp in the house from our phones!
We have been using this thermostat for a few months now and absolutely love it. This is an investment that will pay for itself in savings over the first 2 years easily. There are also so many other expansions in the smart home realm that work with this such as voice control through Amazon Echo and other smart products that can all work together. If you are interested in watching the full setup click here for the video. More info on the Honeywell smart thermostat here.
All of these products and more recommended items from the SSL Family are available at the
Internet running slowly? Need to get through those power outages without dropping connection? In this tutorial I will share few ways to speed up your home internet service, protect from power outages, and even save some money on your bill in some cases.
These tips and tricks are gong to apply to those with cable or DSL type internet service mostly but some other types will benefit as well so stay tuned to see what applies to you. The first tip is in regards to hooking up a cable or DSL modem and I will break it down separately for each.
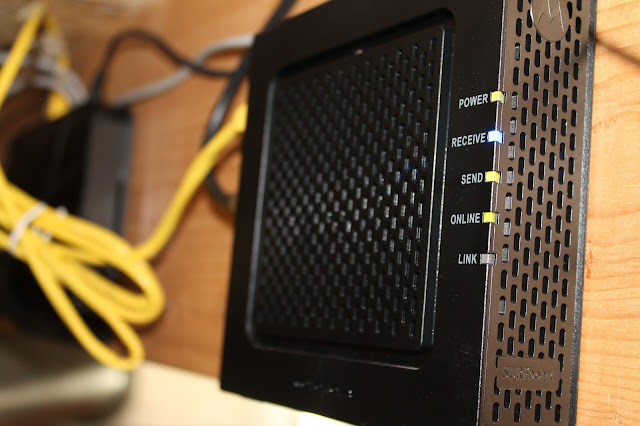
Cable modems - When hooking up a cable modem you should always hookup to the first spilt of the coax cable as soon as it enters your home. In most cases your cable comes in the basement or crawl space and then splits with one or two large splitters to all of your cable jacks in the home. Instead, purchase one good 2 way splitter and install that as soon as the cable enters the home. One leg will go directly to your modem and the other can go to the larger splitters that feed the TV's.
DSL modems - DSL service is provided via phone lines. As with cable it is important to have a dedicated phone jack or line run directly from the outside junction box to your DSL modem. This might require a call to your provider for a free setup but in most cases just follow the lines to make sure it goes directly out to your outside phone connection. With DSL it is also important to make sure you have filters on any phones in your home. These filters are provided by your service provider in most cases or they can be purchased online - http://amzn.to/1PA8Duj.
Purchasing VS. Renting - No matter what kind of internet provider you have in most cases they will provide a modem to you when you sign up for service. But don't be surprised if they are charging you anywhere from $3-$15 per month for that equipment. You can pickup a cable or DSL modem online or at Best Buy/Walmart for less than $60 in many cases. This saves you the monthly fee and also allows you to have newer better equipment. Check with your provider for recommendations on a new modem for the best possible service to your area.
Power protection - Once you have your own nice new modem and router you should provide some basic protection for them. Using a small network battery backup will protect your equipment and also allow you to get on the internet right through a 3-4 hour power outage. These are inexpensive devices and can be setup in minutes. - Battery backup - http://amzn.to/1kxqJCm
Wireless Interference - A properly placed wireless router can be the difference between blazing fast and slow as molasses. The best place for a wireless router is UP HIGH, the higher the better in most cases. You also need to think about what is near the router, cordless phones, microwaves, Christmas lights, TV equipment, speakers, etc. All of these things can dramatically interfere with your wireless signal and slow you down. The orientation of the router is also important. If it is designed to lay down flat, lay it down flat. If it has as stand or legs to stand it up vertically try standing it up. You can also change the orientation and see if signal improves in certain areas as you change it. Above all else it is important to start with a good wireless router. I have a few options below this article of models that I have found to be good. Make sure you have a dual band N or a newer AC standard wireless router and place it in a central location in your home, on the middle level if you have a 2 or 3 story home will be best.
Eliminating dead spots or weak signal areas - If you have followed all of the steps above and you still have weak signal in some areas you can try a couple of things. I did a video on adding a second router here - https://youtu.be/n3plXzZ1Ckc, that can be a great way to solve this issue. If that is not an option consider purchasing a powerline wireless extender - http://amzn.to/1OvyKPN
Ever wonder what you are going to do with all of those tomatoes growing in your garden? Why not make some awesome homemade ketchup that tastes just like the name brand.
It seems like every year I end up with all of these volunteer tomato plants. And, of course, most of them end up being the less desirable cherry tomatoes! So this year I have ended up with literally thousands of cherry tomatoes that are started to drop and just go to waste. I decided to start collecting them all and found a great recipe for homemade ketchup. We tried this recipe a few weeks prior and absolutely loved it and thought we would share the process with you.
Below is the recipe and directions for making homemade ketchup using any variety of tomatoes you have on hand. One thing to remember is that one batch of this recipe only make about 1 half pint of ketchup so if you want to make a lot for long term storage you will need a lot of tomatoes!
Ingredients:
56 ounces or about 4-5 cups of tomatoes (after processed not whole)
2/3 cup sugar
3/4 cup white vinegar
1 teaspoon onion powder
1/2 teaspoon garlic powder
1 3/4 teaspoon salt
1/8 teaspoon celery salt
1/8 teaspoon mustard powder
1/4 teaspoon black pepper
1 whole clove
Directions:
1. Cut tomatoes in halves or quarters and scoop out as many of the seeds as possible then add to blender or food processor.
process until you have enough for one batch or about 56 ounces (4-5 cups once processed.
2. Place tomato puree in pot on stove or in slow cooker ( I much prefer the faster stove method)
3. Cook on med-high heat to cook off excess water. Cook it until it is about half of original volume.
4. You may add all the seasonings while it is cooking down
5. Once it is cooked down ladle into fine metal strainer and force through scraping off the ketchup from the bottom of the strainer as you go into bowl.
6. If ketchup is still watery cook down further until desired consistency.
7. You may can this ketchup for long term storage or if done in smaller batches can be kept in ketchup bottle or canning jar in the refrigerator for a few weeks.
Using up all those tomatoes from the garden can be quite a task! Why not make some homemade salsa and can it for long term storage?
Here is one of the best homemade salsa recipes that I have tried. It is easy, requires little equipment, and can be eaten fresh or canned.
Homemade Salsa Recipe -
3 Cups fresh tomatoes
1/2 cup Green bell peppers
1 cup onion
1/4 cup cilantro
2 tablespoons lime or lemon juice
1/2 teaspoon cumin
1/2 teaspoon kosher or course salt
1/2 teaspoon black pepper
1. Process the tomatoes by washing, cutting in half or quarters, and removing as much of the seeds as possible. I just keep a bowl handy and scoop then out with my finger.
2. Cut up the onions, bell peppers, and cilantro and place in food processor with tomatoes.
3. Add salt, lemon or lime juice, cumin, and black pepper.
4. Process in blender or food processor to desired thickness
5. At this point you can eat it fresh or can it for long term storage.
For a thicker salsa just chop all of the ingredients finer and do not use the food processor the salsa will be awesome either way. As the salsa sits either in fridge or canned the flavor melds together and it becomes even better!
What is the best thing you can possibly eat for breakfast? Well, I am sure this is up for debate but if it were up to me I would vote for anything you can grow or produce right from your own backyard.
Eating fresh vegetables ( I mean, really fresh!!), is probably the best thing you can add to any meal. In this video I showcase what has become one of our favorite little breakfasts.
Since getting our six backyard chickens we have started to find more and more ways to eat our very own fresh eggs. These haven't been shipped across the country, they haven't been refrigerated for days or weeks, they come from chickens that have excellent living conditions, and we get to literally grab them within a few hours or laying. These are fresh eggs! There are some many ways to prepare eggs but the best way to combine fresh veggies is with an omelets. We start this meal with an open faced omelet made from two fresh eggs for the kids and three for adults.
In this quick breakfast I am adding in some fresh veggies from the square foot pallet garden. Starts with a fresh onion, some roma tomatoes, and some basil. I also grabbed some tiny bell peppers from the aquaponics system as well. You can also add spinach and sometimes we grab some kale from the aquaponics system as well.
I like to use butter to cook eggs but the SSL Mom prefers olive oil for it's health and taste benefits (also sometimes coconut oil as well). A squirt or two of oil in the pan and spread it around to evenly coat the pan. I am using our favorite Lodge cast iron here which has been perfectly seasoned and is non-stick. Even with eggs (which are a pretty stick food to cook) they slide around in the pan as if it were premium non-stick cookware. Cast iron ensures we get an even heat and allows cooking at lower temps which saves energy (and money!)
Open faced omelets are a breeze to cook, much easier than trying to flip or fold eggs in a pan! Whip up the eggs, pour in the heated pan, sprinkle with cut up onions, peppers, tomatoes, and basil, and allow to cook for a couple of minutes. Sprinkle on some shredded cheese (if you like that kind of thing), a touch of salt and pepper and you are done!
I also grabbed a fresh Honey crisp apple from our apple tree for a little vitamin C, fiber, and awesomeness. The kids love these little quick open omelets and they allow us to use up our eggs daily while providing a healthy meal. Is this the ultimate breakfast? what do you think?
Below are some of the items that we have and have found to be of high quality and American-made.
Okay, so you have your own backyard chickens and are enjoying some fgresh eggs daily. But what do you do when you want to leave for a vacation? How can you keep them fed and with fresh water? These are some common questions that I get when discussing the suburban chicken coop.
The system I am using here starts with the Poultry Nipples or Chicken Nipples I used in the original chicken watering system. If you haven't seen the video or read the article check it out here - https://youtu.be/L1HeDlewEBc.
We were planning a 5-6 day vacation and our current watering system (the temporary smaller one in the chicken tractor) would not hold enough water for that amount of time. Many times people have suggested that I hook a hose up to this watering system to keep it supplied with water at all times. The only issue with that is that when there is any water pressure on the chicken nipples they tend to drip and also spray out small bursts of water when the chickens peck at them. For that reason I do not recommend this as a long terms solution but for our 5-6 day vacation this will work out perfectly.
I took a trip up to Ace Hardware to grab a few fittings to connect a garden hose up to our 2" PVC pipe system. I started with a cleanup adapter so that I could screw on and off this hose attachment, 2" PVC threaded adapter, reducing bushing to 3/4" or 1/2" and the hardest part to find - a pipe thread to hose thread adapter.
Assembly only took a few minutes and I was ready to hook up the hose and see what the result would be. I just turned the hose on slightly to reduce the amount of water pressure as much as possible. As I suspected the poultry nipples did drip slowly and constantly. I added some river rock under the watering system to prevent a mud puddle (which the chickens love to drink from for some reason). And watched it for a day before we left. It worked perfectly! Chickens had a constant supply of fresh water and the river rocks allowed the dripping system to drain and not create any mess.
This is a perfect way to keep your chickens or other small animals with a fresh supply of water for a short period of time. I have plans to incorporate a float supply system when I redesign the main watering contraption so stay tuned for more on that later.
There are a few simple steps to follow when getting your home A/C unit ready to fire up for the season. The first thing to check is the outside condenser unit. This tends to get the most wear and tear since it is sitting outside. There are many different types of these units depending on where you live in the country or the world but they all have a few things in common.
1.) Check the electrical disconnect for wasps! They seem to love to get in here and make a nest so early in the year it is a good idea to check this and make sure no nesting has begun. You should also inspect the "Line set" or refrigerant lines connecting from the inside of the home to the outside condenser. The larger one should be well insulated from the outside air so make sure that the insulation has not come off or deteriorated. If so, replace with correct size rubber pipe insulation from your local hardware.
2.) Clean the condenser unit. The easiest way to do this is to use your garden hose. Start at the top and spray down at an angle toward the ground back and forth until you get to the bottom. Repeat this to clean and debris and dust from the fins on all sides.
3.) Moving inside the first thing to do is replace or clean your air filter depending on the type you have. If you are using the cheap ones like I have in our home you need to change the twice per season or four times per year. This is important! If you do not change the filter you are lower the efficiency of the unit and costing yourself more money!
4.) Turn off your humidifier if you have one. This usually requires doing two things. If your model has an air flow bypass there should be a damper that needs to be turned off. You also need to turn the humidistat off, usually setting to 0 or in OFF position. This prevents water from just running through to the drain all season long.
5.) The last thing that I normally do is balance the air flow to the house. This isn't as complicated as it might sound and just requires a bit of forethought and knowing where the dampers are located. Each air vent in your home will have a corresponding 6" pipe coming off of the main "truck" line duct. Each one of these should have a damper located near the trunk line. It is best to figure out where each one of these leads and then label them to make this process easier each year. For the cooling season you want to force most of the air to the upper floors of your home so it is best to close all dampers and registers that feed air to the basement. I also close off the ones leading to our bathrooms as I don't see the need to cool these tiny rooms where you don't spend much time (hopefully). I also reduce the air flow to about 50% to all of my 1st floor registers and then make sure all of the second floor are full open. Now if you only have one floor just make sure the 1st floor is all open and the basement is all closed. If you have trouble with humidity in the basement you can leave one or two vents open down there to keep the moisture down.
If you follow these simple steps each year when you fire up that A/C unit you will be on the way to a much cooler and cheaper cooling season! It is also a great idea to raise the thermostat temp during the day or when you are not at home and then lower it at night or when you need the cooling the most. This can make a huge difference in your bill!.
All of these products and more recommended items from the SSL Family are available at the:
Check out this video to see how to build a very simple and inexpensive trellis for any size raised bed garden. Using some scrap wood that I already had I was able to keep the cost of each of these below $1. These are great for growing peas, cucumbers, pole beans, or any other vining crop.
In our case we have six 6' X3' raised bed garden boxes that were made from free pallet wood. I choose to run a trellis down the long side of each box so that I could maximize the amount of climbing crops I could grow. Our family loves pickles and peas so that will be the main use for them this year. This is also the best angle for the sun so that as the vining crops get bigger they will not block out the smaller crops in the box below.
I started by cutting 3 2X4's into 6' pieces and 6 2X4's into 45" pieces. This will make the trellis about 48" tall from the height of the dirt but you can make them shorter or taller of course. Next I ripped down the 2X4's into 1 3/4" wide strips (cutting each one in half long ways). At this point you have made all the cuts that you need for six trellis's.
There are many different ways to connect the frames together but I choose to use a half-lap joint in this case. this will be the strongest joint that will withstand the wind and weight of the fruit hanging in the wind here in Michigan. I used a circular saw to cut each joint down 3/4" by making several close cuts at the ends of each board. I then chiseled out that area until it was fairly flat. These don't have to be perfect and if you mess up a bit you can always sand them flat once they are secured together. Check out the video for more details on this step.
Next I overlapped the half-lap joints and pre-drilled some holes making sure things were square before I drilled. Wood glue is used to secure the joints together along with some 1" wood screws. Once the glue has dried you can get them painted with whatever color you would like. I recommend using a deck stain or other sealer so that they withstand the weather.
At this point you are ready to secure them to the ends of your raised beds. 2 1/2" deck screws were used (2 in each leg) to secure them to the boxes. Next, make a mark every 3" starting at the top and working your way to the bottom on the outside of each leg. Using whatever size drill bit you have around (I always break my small ones) drill a hole at each mark at least big enough to get the fishing line through.
I am using 60 lb. test single filament for this step but you can use whatever size and strength line you would like. You can also use string or any other type of cord here if you would like. I chose fishing line since it is clear it makes them almost invisible during the off season when nothing is growing on them.
Start feeding the line through from the bottom hole and work your way up to the top using one single piece of line for each trellis. If you prefer you can also use one piece for each run back and forth but I chose for less hassle and just weaved the single line back and forth through each hole until I was at the top. Tie it off and the ends or tie a knot so that it cannot slip back through and you are done.
This trellis should be long lasting, stand up to the elements, and look a bit nicer than the standard lattice that you could pick up at the store. Plus, these look much nicer when nothing is growing on them which for us up here in Michigan, is most of the year!
Ever wanted to have your own source of honey? Honey and beeswax have so many uses around the homestead and this is something my wife has wanted for quite some time. So, with our anniversary just around the corner I thought what better to make than a top-bar bee hive!
This is part two of the series on how I am building this hive....
I began by marking the angles on each side piece to match the angle of the end pieces. Using the table saw I matched the angle I had marked and ripped each side board at that specific angle. I was then ready to start assembly.
I placed the end piece on the level surface of my workbench and propped the side pieces up against it at a right angle. I pre-drilled and countersunk each hole (4 per side) and attached the ends to the sides using 2 inch deck screws and wood glue. While the Glue was drying I started working on the legs.
I clamped the legs in place on the end of the hive to match the angle of the sides. I then marked the extra that was hanging to be cut off. Once these were cut to length I then did some finish sanding on the legs and the main body of the hive to clean things up. The legs were used as a temporary stand and a coat of spray lacquer was applied to the hive and legs.
The legs were attached to the hive using 2.5 inch deck screws and pre-drilled holes. I did not use any wood glue here in case I want to take the legs off or make changes to this later. At this point all that is left in this step was to connect the bottom of the hive.
The bottom of the hive will need to open and close so that it can be open in Summer to allow ventilation. I will also install a piece of hardware cloth to keep pest out while the bottom is open. I attached two hinges and a small latch to the bottom panel and then connect it to the hive.
Once the lacquer had dried I did some light sanding on the surface and then applied a second coat on the entire hive. I am not applying any finish to the inside of the hive as I am not sure if this would be good for he bees. The inside will be kept dry and should not need any sealers anyway.
Ever wanted to have your own source of honey? Honey and beeswax have so many uses around the homestead and this is something my wife has wanted for quite some time. So, with our anniversary just around the corner, I thought what better to make than a top-bar bee hive!
We chose to go with a top bar because they are easy to build, maintain, and are great for beginners (or so I have heard). The trick is, we have a budget of next to nothing for this project and the wife and I vowed to get each other something homemade for each other this year. I immediately started thinking of where I could get some free wood for this project. Ah yes! That old kitchen table/picnic table that has been sitting outside in the rain for three years, perfect! I grabbed the table top and benches and made my way to the garage.
The first step for me was to get all of the wood cleaned up and cut away all of the edges and unusable wood. Once this was done I stacked it all up and started planning out some measurements. I have read that the hive should be able 12" deep, about 10 inches wide at the bottom, 120 degree angle coming up and as long as 48 inches. After some careful planning I thought I could get pretty close to these measurements with the wood that I had.
I started by cutting the end pieces to size ( ended up with about 8.5" bottom, 120 degrees up on each side. The length that worked for the wood I had was about 42 inches with sides that were about 15" wide. In order to make the sides I needed to glue a few pieces of wood together using a make shift clamping system on my workbench. For some of the longer pieces (bottom) I glued two boards together end to end using dowels to strengthen the glue joints.
The next step was a lot, I mean a lot, of sanding. I had to grind off years of weathering and stains ( I used the benches as saw horse for awhile so they were pretty beat up). The wood from this table looks like it is birch or maybe poplar and it really is a nice looking wood once it is cleaned up. I also used a glue and sawdust mix to fill in any holes, cracks, or other damaged areas and then sanded them flat.
While the glue was all drying I started in on the legs. I am using 2X4's for the legs and wanted to be a little different than the other hives I have seen out there. I aligned the legs to match the angle of the end pieces of the hive and marked them where they crossed. I then used a circular saw to mill out the area where they crossed down 3/4" on each leg. I then chiseled out the area smooth so that the legs will fit nicely together and make a crossed leg similar to a baby manger (think Jesus in Bethlehem). I then secured these together with glue and clamps and let them set up.
That takes care of all of the prep work and all I could fit into one video. Next up will be assembly and finishing touches on the main part of the hive.
Getting started with beekeeping? Check out these items on Amazon -
Where the subdivision meets the country! This blog chronicles projects, tips, and ideas on how to live in suburban America faithfully, sustainably, organically, and happily using today's technology. We are homesteading as much as we can on this little plot of land we have!