• What is Simple Suburban Living?

    Homesteadin'. Green living'. Animal lovin'. Square foot farmin'. Tree huggin'. Followin' Jesus. That's Simple Suburban Livin'.

  • Backyard Chickens

    Our little homestead grew with the addition of chickens this year. We are happy to share the journey of raising chicks and building the chicken coop with you.

  • Aquaponics and Gardening

    Simple Suburban Living offers a weekly aquaponics episode that highlights the saga of our indoor aquaponics gardening system. We also share our knowledge of square foot gardening and planting seeds. Our homestead is located in southeastern Michigan.

Showing posts with label recipes. Show all posts

Wednesday, January 13, 2016


Stop buying expensive chemical cleaners! We are not the first to use this type of cleaner but it is simple and effective and costs almost nothing! This is the process we use to  mix up a cheap and simple cleaner that can be used on counters, windows, bathrooms, etc. 

The first step is to grab a cheap dollar store spray bottle or use an empty spray bottle of your choice just be sure to wash out whatever was in it thoroughly.
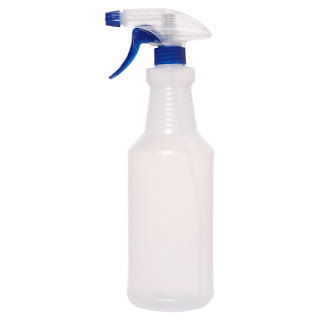
http://amzn.to/1PqW2H9

There are many ways to make your own cleaners depending on what you have access to. We like to start with vinegar in ours and mix with some warm water as a base. I general fill the bottle up about 1/4 with warm water and then the rest of the way with vinegar. This is not an exact science so you can adjust it as you need.

 At this point you have just created a very effective and cheap cleaner. You can stop right here and use it for counters and anywhere you would normally use Fantastic or similar cleaners. But if you want something with a bit more cleaning power, a better scent, and antibacterial properties essentials oils will be needed. The SSLFamily Mom as a post on essentials oils here and links to where you can buy them if you want.

There are infinite combinations and concoctions that you can make with essentials oils but I love to add lemon to just about anything, cleaners included. I normally add between 15-20 drops of the lemon oil, it is cheap and adds a great fragrance to the cleaner as well as helps the cleaning power. I have also recently started adding oregano oil as well. Just a couple of drops; this stuff is more expensive and potent! The oregano oil acts as an anti-fungal and anti-bacterial in the cleaner. Added bonus - smells like a pizza while you clean:)


We have not purchased any cleaners in quite some time here on the Simple Suburban Homestead and I don't see any reason for us to go back. Using these homemade and chemical free options is cheaper, safer, and as an added bonus the kids can use them too! No need to open windows when you clean the bathroom or worry about the kids getting things in their eyes or on their skin. Although I am not sure I would spray this directly in your eye (it would probably not feel  good) lemon in the eyes, ouch!

As an added feature you can sprinkle some baking soda on countertops, floors, etc and then use the spray cleaner. The vinegar and baking soda react and the foaming can help lift and wash away dirt as well.


Check out the full video here

Lemon oil -  http://amzn.to/1HRg80d
Oregano oil - http://amzn.to/1HRgmo2
Spray bottles - http://amzn.to/1PqW2H9
All of these products and more recommended items from the SSL Family are available at the
You can follow us on....

Friday, November 27, 2015


Ever wonder what you are going to do with all of those tomatoes growing in your garden? Why not make some awesome homemade ketchup that tastes just like the name brand.

It seems like every year I end up with all of these volunteer tomato plants. And, of course, most of them end up being the less desirable cherry tomatoes! So this year I have ended up with literally thousands of cherry tomatoes that are started to drop and just go to waste. I decided to start collecting them all and found a great recipe for homemade ketchup. We tried this recipe a few weeks prior and absolutely loved it and thought we would share the process with you.


Below is the recipe and directions for making homemade ketchup using any variety of tomatoes you have on hand. One thing to remember is that one batch of this recipe only make about 1 half pint of ketchup so if you want to make a lot for long term storage you will need a lot of tomatoes!


Ingredients:

56 ounces or about 4-5 cups of tomatoes (after processed not whole)

2/3 cup sugar

3/4 cup white vinegar

1 teaspoon onion powder

1/2 teaspoon garlic powder

1 3/4 teaspoon salt

1/8 teaspoon celery salt

1/8 teaspoon mustard powder

1/4 teaspoon black pepper

1 whole clove


Directions:

1. Cut tomatoes in halves or quarters and scoop out as many of the seeds as possible then add to blender or food processor.

process until you have enough for one batch or about 56 ounces (4-5 cups once processed.

2. Place tomato puree in pot on stove or in slow cooker ( I much prefer the faster stove method)

3. Cook on med-high heat to cook off excess water. Cook it until it is about half of original volume.

4. You may add all the seasonings while it is cooking down

5. Once it is cooked down ladle into fine metal strainer and force through scraping off the ketchup from the bottom of the strainer as you go into bowl.

6. If ketchup is still watery cook down further until desired consistency.

7. You may can this ketchup for long term storage or if done in smaller batches can be kept in ketchup bottle or canning jar in the refrigerator for a few weeks.


All of these products and more recommended items from the SSL Family are available at the Simple Suburban Living General Store
Please follow us on....

Wednesday, November 25, 2015


Using up all those tomatoes from the garden can be quite a task! Why not make some homemade salsa and can it for long term storage?

Here is one of the best homemade salsa recipes that I have tried. It is easy, requires little equipment, and can be eaten fresh or canned.

Homemade Salsa Recipe -

3 Cups fresh tomatoes
1/2 cup Green bell peppers
1 cup onion
1/4 cup cilantro
2 tablespoons lime or lemon juice
1/2 teaspoon cumin
1/2 teaspoon kosher or course salt
1/2 teaspoon black pepper


1. Process the tomatoes by washing, cutting in half or quarters, and removing as much of the seeds as possible. I just keep a bowl handy and scoop then out with my finger.
2. Cut up the onions, bell peppers, and cilantro and place in food processor with tomatoes.


3. Add salt, lemon or lime juice, cumin, and black pepper.
4. Process in blender or food processor to desired thickness
5. At this point you can eat it fresh or can it for long term storage.


 For a thicker salsa just chop all of the ingredients finer and do not use the food processor the salsa will be awesome either way. As the salsa sits either in fridge or canned the flavor melds together and it becomes even better!


All of these products and more recommended items from the SSL Family are available at the Simple Suburban Living General Store

Please follow us on....
http://www.pinterest.com/simplesuburban/
http://www.facebook.com/simplesuburbanliving
http://www.twitter.com/simplesuburban5
http://www.instagram.com/simplesuburbanliving

Wednesday, September 30, 2015


What is the best thing you can possibly eat for breakfast? Well, I am sure this is up for debate but if it were up to me I would vote for anything you can grow or produce right from your own backyard.

Eating fresh vegetables ( I mean, really fresh!!), is probably the best thing you can add to any meal. In this video I showcase what has become one of our favorite little breakfasts.


Since getting our six backyard chickens we have started to find more and more ways to eat our very own fresh eggs. These haven't been shipped across the country, they haven't been refrigerated for days or weeks, they come from chickens that have excellent living conditions, and we get to literally grab them within a few hours or laying. These are fresh eggs! There are some many ways to prepare eggs but the best way to combine fresh veggies is with an omelets. We start this meal with an open faced omelet made from two fresh eggs for the kids and three for adults.

In this quick breakfast I am adding in some fresh veggies from the square foot pallet garden. Starts with a fresh onion, some roma tomatoes, and some basil. I also grabbed some tiny bell peppers from the aquaponics system as well. You can also add spinach and sometimes we grab some kale from the aquaponics system as well.

I like to use butter to cook eggs but the SSL Mom prefers olive oil for it's health and taste benefits (also sometimes coconut oil as well). A squirt or two of oil in the pan and spread it around to evenly coat the pan. I am using our favorite Lodge cast iron here which has been perfectly seasoned and is non-stick. Even with eggs (which are a pretty stick food to cook) they slide around in the pan as if it were premium non-stick cookware. Cast iron ensures we get an even heat and allows cooking at lower temps which saves energy (and money!)

Open faced omelets are a breeze to cook, much easier than trying to flip or fold eggs in a pan! Whip up the eggs, pour in the heated pan, sprinkle with cut up onions, peppers, tomatoes, and basil, and allow to cook for a couple of minutes. Sprinkle on some shredded cheese (if you like that kind of thing), a touch of salt and pepper and you are done!


I also grabbed a fresh Honey crisp apple from our apple tree for a little vitamin C, fiber, and awesomeness. The kids love these little quick open omelets and they allow us to use up our eggs daily while providing a healthy meal. Is this the ultimate breakfast? what do you think?
 
Below are some of the items that we have and have found to be of high quality and American-made.

The five piece set - http://amzn.to/1N7mEvY
Dutch Oven - http://amzn.to/1CKD0cN
Griddle - http://amzn.to/1CKD10C
Lodge scrub brush - http://amzn.to/1IldX0m
10" frying pan - http://amzn.to/1Ile24a
5" Frying pan - http://amzn.to/1LP1U0E
Lodge Cookbooks -
http://amzn.to/1IsXgQP
http://amzn.to/1xfDZ3Y


All of these products and more recommended items from the SSL Family are available at the Simple Suburban Living General Store


Please follow us on....

http://www.pinterest.com/simplesuburban/
http://www.facebook.com/simplesuburbanliving
http://www.twitter.com/simplesuburban5
http://www.instagram.com/simplesuburbanliving


Music - "Go" by Josh Woodward. Free download: http://joshwoodward.com/song/Go


Friday, July 10, 2015


What to do with all that leftover bacon grease? With this simple process you can turn that unwanted grease into something useful around the home - soap. This recipe is very simple and the process takes about 90 minutes from start to finish.
 
The first step is to get the grease separated from any bits of burned bacon or other "stuff". The easiest way to do this is to pour it into a cup of warm water and mix it up. Let the mix sit at room temperature for a couple of hours and then put it in the refrigerator overnight. The grease will all float to the top and the bits will sink to the bottom. This also solidifies the grease a bit to make it easy to scoop off the top. I saved up the grease from a few batches over about 2 months and was able to get about 22 ounces. The lard keeps in the fridge for quite some time to you can save it up for as long as you need to.


Once you have enough it is time to weigh it out and determine how many ounces you have. This will be the base for the recipe and all other ingredients will be based from this amount. Once you have the ounces head over to www.soapcalc.net and click on "soap calc lye calculator". This will take you to an 8 step process to determine your recipe.
 
1: Select NAOH - This is the type of Lye I used and is commonly bought as pure lye drain cleaner. You can also use KOH which is derived naturally from wood ashes.
2. Input the weight of your lard - mine was about 22 ounces
3. You can leave this at about 38% as they recommend
4. Super fat can be left at 5%. You can go lower and you will end up with a less oily soap, go higher for a more oily soap. If you go too low you risk having pure lye left over from the saponification process which could be bad for your skin. I recommend 4 or 5%
5.  Select "lard, pig tallow" from the list of oils. Here you can see you can make soap from all kind of different oils.
6. Click "add" and then type 100% in the box. You can mix other oils in with this calculator as well if you so wish.
7. Calculate and then display/print your recipe.
You now have all of the info you need to get started.
 
Get out two stainless or glass pots and set on separate burners, put both on low or one notch up from low heat. Next weigh out the water according to the recipe and add it to one of the pots. Add your lard to the other pot. Weigh out your lye according to the recipe and slowly stir it into the warm water until it is dissolved. Once the lard is liquefied go ahead and add the lye mix to the lard and slowly stir it in.
This is where the fun begins (ok, not really) you need to stir this mix for about an hour. I stirred it for about 5 minutes and then went away and came back after about 10 minutes to stir again. Keep doing this until the lard thickens. Once you are getting a trace behind the spoon when you stir you know it is ready.
 
At this point you can add some food coloring and essentials oils or other fragrance as you wish. You will need to turn the heat down and stir the coloring and fragrance in pretty well (I didn't do this well and that is one reason mine turned out pink and not red.)


Now you can pour the soap into some kind of mold. I used a plywood rectangle mold that I threw together in a few minutes. You can purchase nicer ones below. Once in the mold you need to let it sit for 24-48 hours and then you can cut it out and slice it into bars of any size. It is best at this point to let the soap sit for a week or two to fully harden and let the saponification process complete fully.


At that is it, you have just made soap from back grease or lard. We have been using it for about a month now and we all love it. It is not the best soap you can make but for next to nothing you can make basic soap from grease that you would probably throw away anyway. You can also be creative with the soap calc and add in other types of oils to get different results, have fun with it and see what you can come up with. Please share any recipes that works well for you on our Facebook page or here on the blog or YouTube comments.
 
Pure Lye - http://amzn.to/1KIq0Je
Soap molds - http://amzn.to/1dadmUR
                        http://amzn.to/1AJpUxu
                        http://amzn.to/1KIqaA7
 
 
All of these products and more recommended items from the SSL Family are available at the
 
Please follow us on....
 
Special thanks to The King of Random for the inspiration on this process. http://www.tkor.squarespace.com/


This post has been shared at:  Our Simple Blog Hop, Front Porch Friday


Friday, February 6, 2015


When I found out how easy it was to make homemade flour tortillas, it revolutionized our taco life.  I told you before how much the SSL Family Dad loves tacos.  Well he loves them even more on homemade tortillas.  They're softer, they taste better and they only have five ingredients.  We've said goodbye to the remaining 15 chemicals that are in our store-bought tortillas forever and that makes me one happy cooking mama.
 
Ingredients
 
2 cups all-purpose organic flour
1 1/2 teaspoons baking powder
1/2 teaspoon salt
2 tablespoons coconut oil
3/4 cup milk, room temperature
 
1.  Combine dry ingredients and coconut oil in a mixing bowl and stir.
2.  Add milk and stir.  Dough will form into a ball.
3.  Sprinkle flour on your surface and knead dough for two minutes.
4.  Place dough back in mixing bowl and cover with a damp towel.  Let sit for 30 minutes.
5.  Divide dough in half by twisting apart.  Divide each half into five equal balls of dough for a total of 10 balls of dough.
6.  Place balls of dough on a plate and cover with damp towel.  Let sit for 10 minutes.
7.  Heat skillet on medium.
8.  Lightly flour your surface and rolling pin.  Roll each ball into 8" discs.
9.  Cook tortillas approximately 30 seconds on each side.  Bubbles will form, you can pop them if you'd like to make the tortillas cook more evenly.
 
That's it!  So easy and they taste great.  We use them for sandwich wraps, too.  I usually make a double-batch at a time for our family of five.  They last 5-7 days in an air-tight container in the refrigerator.  I usually pop them in the microwave before making sandwiches if they've been stored in the refrigerator.
 
Blessings!
Lisa


 This post has been shared at:  Country Fair Blog Hop


Tuesday, December 30, 2014


My husband's favorite meal is tacos.  Chicken tacos, beef tacos, taco salads, walking tacos, quesadillas, burritos, you name something Mexican and I'm sure we've made it before.  So when I stumbled upon this recipe for homemade taco seasoning, I ran right to the store to buy the ingredients in bulk. 

Taco seasoning isn't too expensive but I am always trying to find ways to cut down on our grocery bill, and when you eat as much of it as we do, making our own is definitely cheaper.  Plus, the littlest SSL Family Kids are not into spicy food, so making my own seasoning means I can control the heat for them.

My good friend also reminded me that this seasoning is gluten-free, whereas, store-bought is not.  There are hidden fillers, preservatives and MSG in the store-bought packaged seasoning as well.  To me, these are all great reasons why making our own is the better choice, and we're taking another step towards being chemical-free.

Homemade Taco Seasoning Recipe

1 tablespoon chili powder
1/2 teaspoon garlic powder
1/4 teaspoon onion powder
1/4 teaspoon crushed red pepper flakes
1/2 teaspoon dried oregano
1/2 teaspoon paprika
1 1/2 teaspoons ground cumin
1 teaspoon sea salt
1 teaspoon black pepper

This recipe makes about 3 tablespoons of seasoning.  I usually double or triple the recipe each time I make it.  I also leave out the crushed red pepper flakes most of the time to keep it milder for the kids.  I have found that two tablespoons of seasoning is usually plenty for one pound of ground beef or chicken. 

We store our seasoning in an old garlic salt container.


We love it and do not notice any difference from the store-bought seasoning packets.  This recipe also makes it easy to play around with and modify according to your taste. 

Go ahead and give it a try!  And if you mess up, there's no problem that a bunch of salsa and sour cream can't solve..........


This post has been shared at:  Homestead Barn Hop, Country Fair Blog Hop, HomeAcre Hop

Sunday, December 28, 2014


So I celebrated my birthday a week ago and my wonderful step-father gave me this card.  Little does he know that I don't fry bacon anymore, and especially not in the nude.  No way, never.  But this card got me thinking that maybe there are people out there that do fry bacon naked.  And maybe, just maybe, those people need to hear about my method of bakin' bacon. 

Baking bacon is so easy.  This method keeps most of the grease away from the bacon, it's faster, cleanup is a breeze, and it frees up much needed stovetop space when making breakfast. 

And it keeps those painful splatters from splattering.

First, preheat the oven at 425 degrees and get out a cookie sheet and the aluminum foil.


Rip off a piece of aluminum foil about 6-8 inches longer than your cookie sheet and wad it into a big ball.


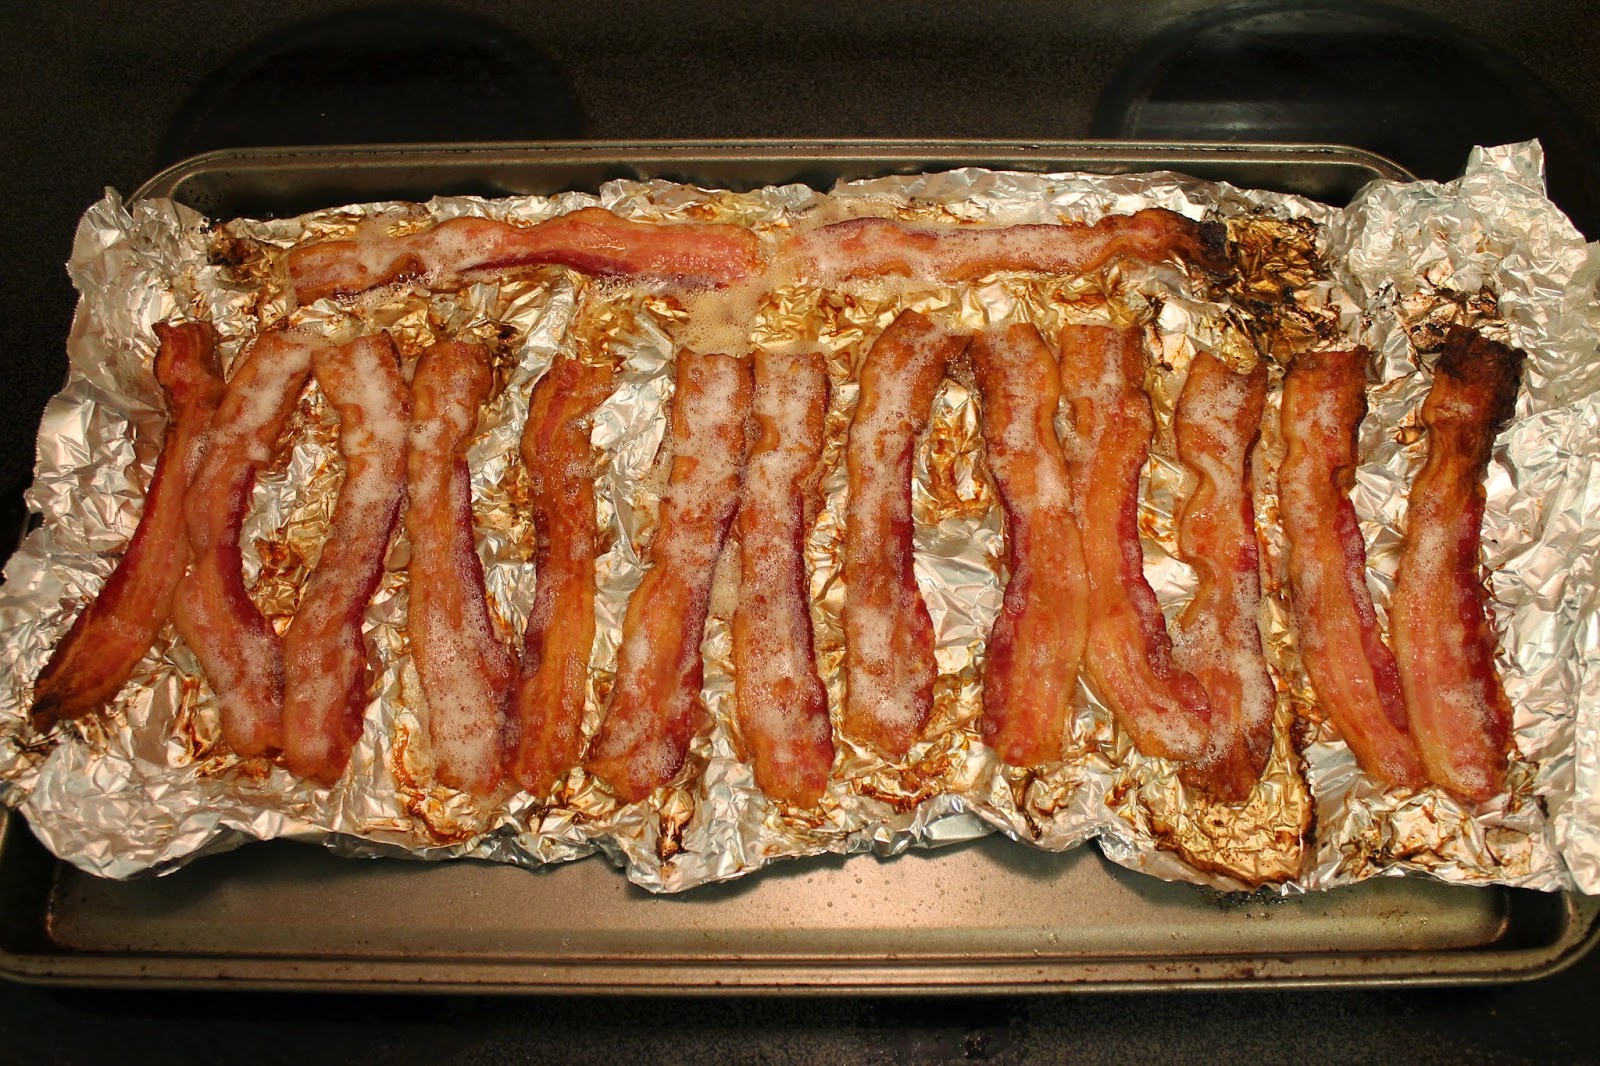
Next, loosely stretch out the aluminum foil and lay it over your cookie sheet.  This folks is where it's at, the aluminum foil makes nice little valleys for the grease to drip into.


Lay your bacon strips out on the aluminum foil and bake for about 10-15 minutes, depending on how crispy you like it.  We like ours extra crispy, so we leave in longer.  Just keep checking it.  You will also want to turn your hood fan on because it can get a little smoky. 


And since bacon shrinks, I ended up throwing a few more strips onto the cookie sheet after I took that picture.  I can usually squeeze a pound of bacon on one cookie sheet. 


And that folks, is how I bake bacon.  If you have any tips or tricks on how you make bacon, please share, I'd love to hear from you!

Blessings!
The SSL Family Mom


This post has been shared at:  Homestead Barn Hop

Saturday, December 20, 2014


Do you have a bread machine just sitting around in your cupboard or basement like I did?  I received mine as a birthday present from my husband a few years ago and rarely ever used it.  I walked into my neighbor's house several weeks ago and noticed she had a bread machine on her counter.  We got to talking and she explained to me that she never buys store-bought white bread.  She only bakes fresh bread for her kids' lunches. 
 
Hmmmm....that got me thinking about that lonely little machine in my cupboard. 
 
That also got me thinking about all the ingredients (chemicals) that are in our $1 loaf of grocery store white bread.  And why doesn't bread mold anymore?  It's just got to be all those preservatives.
 
It's been about four weeks since I've started baking bread daily for our family.  Yes, daily for our family of five.  You may be thinking, "thanks for asking me to fit one more task into my day."  Well, that's what I thought, too, and that's where the machine comes in. 
 
This recipe for basic white bread only uses seven ingredients and it only takes 5 minutes to put the ingredients in the machine and turn it on.  Four hours later, you will have a beautiful loaf of fresh bread.  It's very simple, the bread tastes much better, and our home always smells like fresh bread. 
 
And I have peace of mind knowing my girls' lunches are a little healthier.
 
Basic White Bread Recipe (extra large loaf)
 
Dry yeast 1 1/4 tsp
Bread flour 4 1/2 cups
Salt  2 tsp
Dry Milk  3 tbsp
Butter  2 1/2 tbsp
Sugar  1 1/2 tbsp
Water  400 mL
 
Ingredients go into the machine's loaf pan in the order they appear in the recipe.  No need for mixing!
 
When the timer goes off, your machine will automatically shut off so it's okay if you're not home when the bread is done baking.  Take the loaf pan out of the machine, shake out the loaf onto a cooling rack.  Wait until the bread is done cooling to place in a bag or cellophane.  That's it! 
 
Cleaning the machine is super easy, too.  Just wipe the loaf pan out with a dish towel and place back into the machine, ready for your next loaf.
 
You will want to make sure you have your ingredients on-hand if you plan on doing away with store-bought bread like we did.  We have 50 lb. bags of flour and sugar that we picked up from an Amish store over the summer.  We also ordered a 2 lb. bag of dry yeast from Amazon.  And to make things a little easier, you can also stock up and make extra loaves and freeze them. 
 
I have enjoyed this lifestyle change so much that I had to share it with all of you.  I hope you give it a try!  Let me know how it goes. :)


Watch this video to learn how to make bread using a bread machine! 


Also available at Best Buy


Thursday, July 3, 2014


Our family saves so much money by making our own laundry soap. I encourage you all to try it at least once!


The girls help me make it and we all enjoy that time together.  The process is much easier than I thought it would be, and much cheaper than I thought it would be, too.  All of the ingredients cost less than $10.00 at Walmart, and the amounts needed for one 10-gallon recipe cost less than $2.00.  The time it takes us to assemble it all is probably less than 15 minutes.  What a deal!


Disclaimer/Please Learn From My Mistakes/Warning:  We picked up a pickle bucket from a local pizzeria.  Unless you like the smell of dill pickles, you might want to go with a different smelling bucket than we did.  Our bucket of soap literally smells like soapy pickles.  But thankfully, our clothes do not. 


You can always add essential oils to your soap to make it smell even nicer.  If any of you use oils to scent your soap, please let me know which scent you use.  I'd love to try, just not sure which one to use.


Homemade Liquid Laundry Soap Recipe


Ingredients:

4  Cups - hot tap water

1  Fels-Naptha bar of soap ($0.97 each, available at Walmart)

1 cup Arm & Hammer Super Washing Soda* ($3.24 per box, available at Walmart)

½ cup Borax ($4.00 per box, available at Walmart)


Directions:


-Add 4 cups hot tap water to pot on stove over medium-low heat.

- Grate bar of soap and add to pot with water.

-Stir continually over medium-low heat until soap dissolves and is melted.

-Fill a 5 gallon bucket half full of hot tap water.

-Add melted soap, washing soda and Borax to bucket.

-Stir well until all powder is dissolved.

-Fill bucket to top with more hot water.

-Stir, cover and let sit overnight to thicken.

-The next day, stir and fill a used, clean, laundry soap dispenser half full with soap and then fill rest of way with water.

-Shake before each use.


Optional: You can add 15 drops of essential oil per 2 gallons once soap has cooled.

Recipe will yield 10 gallons of liquid laundry soap.


-Top Load Machine- 1/2 Cup per load

-Front Load Machines- ¼ Cup per load (never tried, but hear it works great)


Here is our video that goes through the whole process.  I encourage you all to give it a try!


http://simply-living-simply.com/simple-saturdays-blog-hop-31/

This post has been shared at:  The HomeAcre Hop, Simple Lives Thursday, The Backyard Farming Connection Hop, Simple Saturdays Blog Hop, Homestead Barn Hop, Natural Living Monday, Wonderful Wednesday Blog Hop