• What is Simple Suburban Living?

    Homesteadin'. Green living'. Animal lovin'. Square foot farmin'. Tree huggin'. Followin' Jesus. That's Simple Suburban Livin'.

  • Backyard Chickens

    Our little homestead grew with the addition of chickens this year. We are happy to share the journey of raising chicks and building the chicken coop with you.

  • Aquaponics and Gardening

    Simple Suburban Living offers a weekly aquaponics episode that highlights the saga of our indoor aquaponics gardening system. We also share our knowledge of square foot gardening and planting seeds. Our homestead is located in southeastern Michigan.

Showing posts with label auto repair. Show all posts

Saturday, January 2, 2016


https://youtu.be/gadHYTpa4Bs

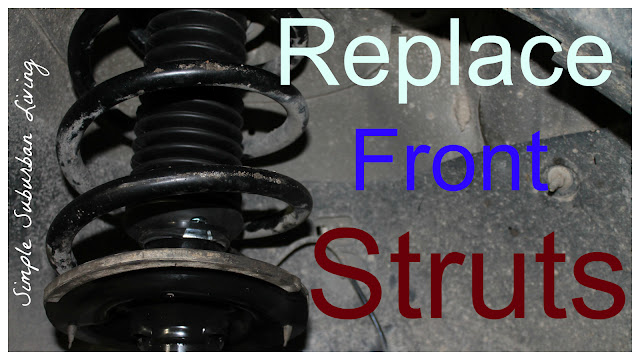
Bumpy ride? Noisy front end? It might be time to replace your front struts and get your Traverse, Acadia, Enclave, or Outlook back to smooth sailing. In this tutorial I go through the average Joe version of replacing the front strut assembly on my 2009 Chevy Traverse. The process is quite simple but does require a few new parts and a good portion of a Saturday afternoon. Doing this job myself saved me almost $600!

1 - Loosen the front lug nuts on both wheels before you jack up the vehicle (you should do both struts at the same time).Then jack up the vehicle and place it on jack stands then remove the tires completely.

2 - Remove the guard under the hood that covers the windshield wiper motors. Use a flathead screwdriver to pop up the center portion of the clips and remove the grounding post near the battery. Remove the windshield wiper arms with a 15mm socket after popping up the plastic cap covering the nuts. Once the clips, grounding post, and wiper arms are removed you can then remove the entire plastic cover.

3 - Removing the plastic cover exposes the tops of each strut. There are three 15mm nits here, remove 2 of them and loosen the third but leave it on the threads to hold the strut in place.
http://amzn.to/1kOc2uI
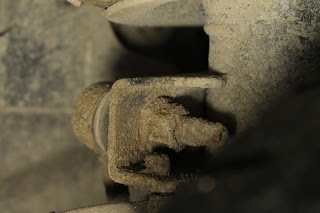
4 - The struts are attached to the vehicle suspension with a stabilizer link. This needs to be removed from the strut with an 18mm wrench on the outer nut and an 8mm socket on the inner. Remove the ABS wiring from the strut by popping out the clips. Since the stabilizer is connected to the linkage with a flexible covered knuckle you have to hold the inner shaft with the socket as you remove the nut with the wrench. Mine were rusted on so bad that I ended up breaking one while removing it. I found a replacement here for cheap - http://amzn.to/1kOc2uI

5 - Remove the 2 bolts that hold the bottom of the strut to the wheel assembly. Brace the caliber and wheel bearing with wire or blocks before you remove these bolts. Once they are broken loose, thread the nut to the end of the bolt and give it a few good whacks with a hammer to pop the bolts out the opposite side.

6 - While holding the shock from the bottom reach up above and remove the last 15mm nut which will allow the strut to drop through and be pulled out.
http://amzn.to/20NvQzp
7 - I chose to purchase just the shock and reuse the coil for this job but you can do it either way. The shock I used is here - http://amzn.to/1SKkFSR. You can also buy the entire strut assembly but it is quite a bit more costly. To reuse the coil you need a coil compression tool found here - http://amzn.to/1Nsgt5E.

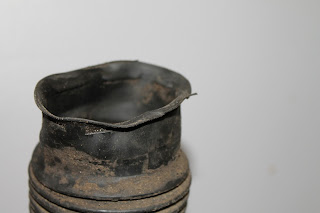
8 -Place the coil compression tool on each side of the coil and tighten alternating a little bit on each side until the coil is loose. Next remove the center nut on the end of the strut by holding the coil with vice grips and use some penetrating oil to loosen the nut if rusted. Save the rubber pieces on the bottom and top. I also replaced the rubber covers with new ones found here - http://amzn.to/20NvQzp
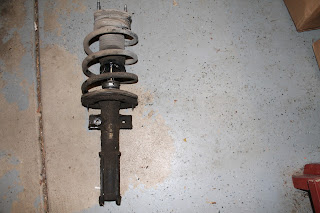
http://amzn.to/1SKkFSR9 - Remove the old strut/shock and replace with the new one and reassemble the opposite way it was taken apart. Once the center nut it tightened on the top you can slowly release the tension on the coil compression tool alternating each side as you loosen.

10 - Feed the new strut back up through the holes above the wheel and into place. Then replace the nuts on the top and tighten them mildly. Next replace the two large bolts on the wheel trying as best as possible to tighten them in the same orientation as before they were removed. Look for the wear marks and line it back up along the same marks.

11 - Replace the ABS wiring clips and reattach the stabilizer bar to the strut. Fully tighten the top 15 mm nuts, replace the tire and tighten lug nuts, replace the wiper arms, replace the plastic shroud, and lower the vehicle to the ground. Fully tighten the lug nuts on both tires.
I would recommend double checking all of your connections and bolts and then taking the vehicle for a test drive. Check for alignment and listen for any noises or vibrations that seems abnormal. The vehicle should be riding much more smoothly and handle tighter and stiffer than before.

Full video here


Everything you need for this job
Coil compressor tool - http://amzn.to/1Nsgt5E
AC Delco stock struts - http://amzn.to/1SKkFSR
Replacement boot kit - http://amzn.to/20NvQzp
The stabilizer bar link that I broke during this repair - http://amzn.to/1kOc2uI
All of these products and more recommended items from the SSL Family are available at the Simple Suburban Living General Store - http://astore.amazon.com/simpsubulivi-20
Follow us on....

Sunday, August 23, 2015


Can you rotate your own tires? How often should you rotate your tires? These are some of the common questions out there surrounding this very simple process. You should be rotating your own tires unless your tire shop does it for free with the purchase of your new tires. This is a very easy process that should be done along with oil changes or at least every 5,000 miles or so.


Step 1: Using an impact wrench, 4-way, or tire iron loosen all of the lug nuts on all four tires. Do not take them all the way off yet!


Step2: Safely jack up the front or rear of your vehicle and use jack stands to support both wheel off the ground. remember to use jack and jack stands only on solid frame on the underside of the vehicle. 


Also place wheel blocks under one of the tires and make sure you are on a flat surface and the vehicle is in park. Move your jack around to one of the opposite wheels from where you placed your jack stands and then lift the wheel off the ground. you should only be lifting the wheels off the ground just enough to slide your hand underneath the wheel. You should now have 3 wheels off the ground and one wheel on the ground with blocks in front and rear of the tire.


Step 3: Remove the 3 wheels that are off the ground and place them in the position that they will go next. More on that in the next step.


Step 4: Tire rotation for front wheel drive vehicles - the two front tires will go directly to the same side in the back. The back tire on the right will go to the front left and the back tire on the left will go to the front right.


Rear wheel drive vehicles - Both rear tires will go to the front on the same side. front left will go to rear right and front right will go to rear left.


Step 5: Rotate the tires according to the pattern in step 4 for the three wheel that you have off. Then lower the jack and move it to the other side, lift the vehicle and switch the remaining tire.


Step 6: With all tires securely in place, lower the vehicle to the ground fully. Next, tighten all of the lug nuts fully now that the tires are on the ground and will not spin.


Step 7: Take your vehicle for a test drive. You may hear some mild humming or it might "fell" a little different for a couple of weeks especially if you have waited too long between rotations.


Simple Suburban General Store


Please follow us on....

http://www.pinterest.com/simplesuburban/
http://www.facebook.com/simplesuburbanliving
http://www.twitter.com/simplesuburban5
http://www.instagram.com/simplesuburbanliving


Friday, September 12, 2014

http://amzn.to/1uKaO1a


Watch this video to see an overview of how to recharge an air conditioning system in any modern vehicle. I am using the A/C Pro recharge hose, gauge, and refrigerant. The product can be found HERE.


Earlier this year in our Chevrolet Traverse, the air conditioning started to get a little on the warmer side, and throughout the summer has all but stopped working. I was afraid that a more major issue was the cause but was hopeful that topping the system off with some r134a would solve the problem. So far, the air has been working excellent since the recharge and I am hoping that no major leaks are present. The AC Pro kit comes with the gauge and coolant that you need to complete the job from start to finish and only takes about 10-15 minutes to complete.

This process should hold true for just about any vehicle with an air conditioning system manufactured after 1995. The hardest part, in most cases, is just locating the correct service or fill port on the vehicle but, luckily, it is pretty dummy proof.. The hose will only fit on the correct fitting so as long as it fits easily and clicks into place you should be okay.


The AC Pro video can be found here - http://youtu.be/Wn0C9jPOAAQ

Monday, July 21, 2014


This is just one of those things that I think more and more people need to get back to doing themselves. I have had bad luck with cheap oil changes and have vowed to never pay someone to change our oil again.

I have learned in the past that it is much more fulfilling, cheaper, and better for your vehicles to change your own oil. The quickie oil change places use horrible oil and I have had some bad experiences with loose drain plugs, leaks, filling the wrong fluids in the engine, and other mishaps at these places. In the long run, I choose to put the saved money into better oil and to ensure that I have done everything correctly.  If I screw something up I only have myself to blame. Changing your own oil is just one thing that we should all know how to do and, since it only takes less than an hour, there is no reason to hand your expensive vehicles over to someone else. This is also part of becoming more self-sufficient!

You can use the tool below to find your oil filter, air filter, and even buy oil at the bet prices I have found!


I like to bring the kids along when I can and show them how things work as well, even if they never have to do this on their own, they will understand how it is done and why.

Watch this video for a basic walkthrough of how to change the oil in a 2003-2006 model year Chevy Avalanche. This walkthrough will also be similar for Chevy 1500 trucks, suburban, Cadillac escalade, GMC, Silverado, and other vehicles with the 5.3 liter Vortec engine.

This video goes through the process that I use to get the job done.  Many of you may have other suggestions or ways that you do things. Please share your experience!  Thanks for stopping by.


Thursday, April 10, 2014


This is a video walkthrough of the basic process to change the oil in a Chevrolet  Traverse, Buick Enclave, or GM Acadia. This video will walk through step by step and should be accurate for 2009-2012 models.

You can use the Amazon tool below to select your oil filter, air filter, and also buy oil!


This will also show you how to reset the oil life gauge on the dash. I have been changing my own oil for years and highly recommend it over using the cheap drive-through oil change places. Use good oil, change the oil every 5000 or less miles, and your engine will run smooth and last a long time.

Let me know if you have any questions,

Todd