
Bumpy ride? Noisy front end? It might be time to replace your front struts and get your Traverse, Acadia, Enclave, or Outlook back to smooth sailing. In this tutorial I go through the average Joe version of replacing the front strut assembly on my 2009 Chevy Traverse. The process is quite simple but does require a few new parts and a good portion of a Saturday afternoon. Doing this job myself saved me almost $600!
1 - Loosen the front lug nuts on both wheels before you jack up the vehicle (you should do both struts at the same time).Then jack up the vehicle and place it on jack stands then remove the tires completely.
2 - Remove the guard under the hood that covers the windshield wiper motors. Use a flathead screwdriver to pop up the center portion of the clips and remove the grounding post near the battery. Remove the windshield wiper arms with a 15mm socket after popping up the plastic cap covering the nuts. Once the clips, grounding post, and wiper arms are removed you can then remove the entire plastic cover.
3 - Removing the plastic cover exposes the tops of each strut. There are three 15mm nits here, remove 2 of them and loosen the third but leave it on the threads to hold the strut in place.
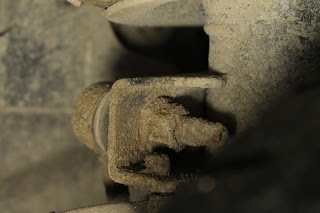
 5 - Remove the 2 bolts that hold the bottom of the strut to the wheel assembly. Brace the caliber and wheel bearing with wire or blocks before you remove these bolts. Once they are broken loose, thread the nut to the end of the bolt and give it a few good whacks with a hammer to pop the bolts out the opposite side.
6 - While holding the shock from the bottom reach up above and remove the last 15mm nut which will allow the strut to drop through and be pulled out.
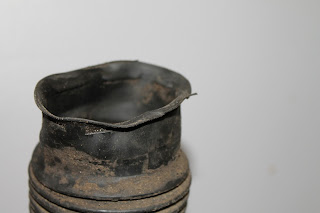
8 -Place the coil compression tool on each side of the coil and tighten alternating a little bit on each side until the coil is loose. Next remove the center nut on the end of the strut by holding the coil with vice grips and use some penetrating oil to loosen the nut if rusted. Save the rubber pieces on the bottom and top. I also replaced the rubber covers with new ones found here - http://amzn.to/20NvQzp
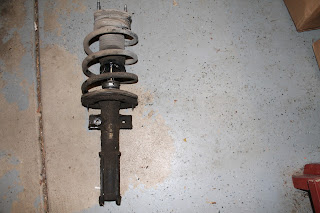 9 - Remove the old strut/shock and replace with the new one and reassemble the opposite way it was taken apart. Once the center nut it tightened on the top you can slowly release the tension on the coil compression tool alternating each side as you loosen.
 10 - Feed the new strut back up through the holes above the wheel and into place. Then replace the nuts on the top and tighten them mildly. Next replace the two large bolts on the wheel trying as best as possible to tighten them in the same orientation as before they were removed. Look for the wear marks and line it back up along the same marks.
 11 - Replace the ABS wiring clips and reattach the stabilizer bar to the strut. Fully tighten the top 15 mm nuts, replace the tire and tighten lug nuts, replace the wiper arms, replace the plastic shroud, and lower the vehicle to the ground. Fully tighten the lug nuts on both tires.
 I would recommend double checking all of your connections and bolts and then taking the vehicle for a test drive. Check for alignment and listen for any noises or vibrations that seems abnormal. The vehicle should be riding much more smoothly and handle tighter and stiffer than before.
Full video here
Everything you need for this job
Coil compressor tool - http://amzn.to/1Nsgt5E
AC Delco stock struts - http://amzn.to/1SKkFSR
Replacement boot kit - http://amzn.to/20NvQzp
The stabilizer bar link that I broke during this repair - http://amzn.to/1kOc2uI
AC Delco stock struts - http://amzn.to/1SKkFSR
Replacement boot kit - http://amzn.to/20NvQzp
The stabilizer bar link that I broke during this repair - http://amzn.to/1kOc2uI
All of these products and more recommended items from the SSL Family are available at the Simple Suburban Living General Store - http://astore.amazon.com/simpsubulivi-20
Follow us on....


0 comments :
Post a Comment